Lola and Finn's Mum

Lola and Finn's Mum

Friday, 28 October 2011

Cottage pie - with a twist!

Not that there is anything wrong with an ordinary of course but when I ran across this wonderful James Martin recipe several years ago it was begging to be tried. I had only discovered horseradish back then; it was never something i had encountered in my cooking (which at that time was limited) or eating (not limited but....) though my partner than and now used to have a massive dollop of it with his roast beef and I knew he liked it, so whilst I was still at the stage of the relationship where I still felt the need to impress (!) I decided this was the recipe with which I would ring the changes.


A note about mash: A very personal thing if you ask me. It's not about silky 'pommes puree' it's about the mash I had as a kid which is thick not 'loose', mimics the shape of cumulus clouds on the plate and is made with full fat milk or cream and a dollop of butter. Mash is unashamedly comfort food. Pipe it on if you like to make it look pretty, but it's all about it's untidiness for me. Dollop it on the top and press it down with the tines of a fork or a pallet knife. And no matter how I try, there is nothing as good as my mum's mash. It obviously has an added extra ingredient that I will never be able to find.

And horseradish: Add to taste. Over the years I have come to prefer a more spiky flavoured mash for this, so you need to add a little and taste, and then adjust as necessary.

Comforting Cottage Pie (adapted from James Martin's fabulous recipe!) Serves 4 hungry people.
Preparation and cooking times

Prep 30 mins
Cook 1-2 hours
Ingredients

1 tbsp oil
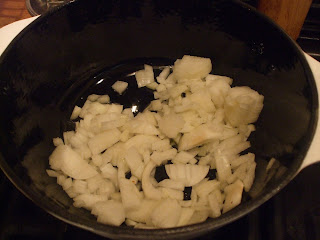
1 large onion chopped
2 cloves garlic finely chopped
3 medium carrots, chopped
560g/1¼ lb beef mince
400g/14oz can tomatoes
290ml/10fl oz beef stock
1 bay leaf
fresh thyme leaves from 1 sprig (or a tsp of dried)
2 tbsp tomato puree
salt and freshly ground black pepper
some finely chopped parsley (optional - I like parsley!)
For the topping

750g/1½ lb potatoes, peeled and chopped
225g/8oz parsnips, peeled and chopped
2 tsp creamed horseradish
75g/2½oz butter
55ml/2fl oz milk

Or however you like to make your mash. I aim for parsnips to make up a third of the total of 'mash' and then add the horseradish to taste. Don't forget to season.
Preparation method


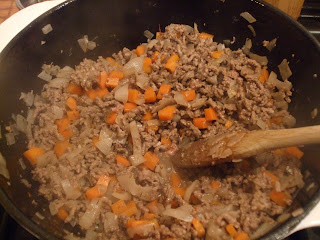
Preheat the oven to 190C/375F/Gas 5 and heat the oil in a large pan. Add the onion and carrot and cook over a medium heat for 5 minutes until soft.


Add the minced beef and cook for 3 minutes to brown.


Add the tomatoes, purée, beef stock, bay leaf and thyme.

Cover and simmer for 30 - 40 minutes or so depending on how you like your mince. I like mine not dry, but with some 'wetness'. It's important that the mince mixture does reduce so it is robust enough to hold the mince that you are going to dollop onto it later.  Season. It is important that you check at this stage for taste. You are looking for something quite tasty to compete with the mash.


Meanwhile, to make the topping, boil the potatoes and parsnips in water until soft. Drain and mash with the butter and milk. Stir in the horseradish and season with salt and pepper. Once again, very important to taste at this stage.


Spoon the meat into an ovenproof dish. Top with the mash, dot with some butter and bake for 30 minutes until golden brown.


And what's more, if you have any left over bung it in the fridge and then reheat for another meal. If it's at all possible it tastes even better second time around! The joy of leftovers!

Thursday, 27 October 2011

When cake and pie collide. Lemon Meringue Pie Cake.

One of my weirder habits is my ability to eat lemons. Whilst a reasonable party trick when you have had a night on the pop and everybody looks at you in wonderment, when they sober up if they remember, they think you are a bit odd, so somehow I have to get a lemon kick. I wouldn't want you to think this is tantamount to eating lemons but the cake gives a zingy citrus bang before being tempered by the sweetness of the meringue and the creaminess of the frosting. Yum!

Away from the taste though, I just think this is such a satisfying, homemade looking cake. I love its ramshackle look; layer of cake, layer of crunchy then gooey meringue, a seam of vibrant lemon curd, cream cheese frosting and so on. Sometimes its not about look; it's about being homemade. And should the meringue crack a bit when I take it out of the tin, well so be it. A dusting of icing sugar hides the misdemeanour.

Some cooking pointers. I subbed philly for mascarpone. This was a decision motivated by there being no mascarpone cheese in the local Co-op, but the original recipe calls for mascarpone. I think the difference would be minimal as there are a lot of taste sensations going on.

In addition, I baked the cakes for about 15 minutes or so before taking them out and placing the meringue topping on. This is more to do with my paranoia of the cake not cooking properly once it is insulated by meringue than anything else. The original method suggests topping the raw cake batter with meringue and then baking.

My paranoia of a bad bake made me cover the cakes with foil for the last 15 minutes or so because whilst they looked happily golden on top, I felt after testing with a skewer, the cake was just a little too raw for my liking. This is an option you could use if you worry about such matters as I do.

But, try the lemon thing...fruit, pith and peel... and see if you can eat one without cringing.


Lemon Meringue Pie Cake - adapted from here, with nicer photos of the finished product!!!

Cuts into 12 slices

Ingredients:

For the cake:
 
  • 3 unwaxed lemons
  • 200g softened butter
  • 200g caster sugar
  • 3 medium eggs
  • 250g self-raising flour, sifted
  • 6 tbsp milk
  • some lemon juice, reserved from the lemons.


For the Meringue:
  • 2 medium egg whites
  • 100g caster sugar

 
For the frosting:
  • 250g tub mascarpone

 
2 tbsp sifted icing sugar plus a little extra for dusting


  •  half a 450g jar of lemon curd

Method

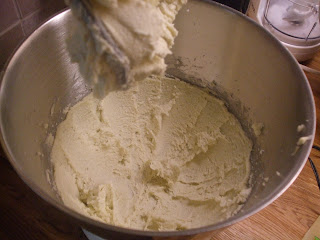
Preheat the oven to 160C/140C fan/gas 21⁄2. Line the bases of 2 x 20cm sandwich cake tins (about 5cm deep) with nonstick paper. Grate the zest from the lemons and put in a bowl with the other cake ingredients. Beat together with an electric hand whisk for 2-3 minutes until light and fluffy. Spoon into the tins and level the tops.

Whisk the egg whites until stiff, then gradually whisk in the sugar until the meringue is stiff. Spoon half the meringue over each cake and spread to within 2cm of the edges. Swirl the meringue with the tip of a knife.
Bake the cakes for 35-40 minutes until the meringue is crisp and golden and the cake is firm. Test by inserting a fine skewer through the meringue – if just a few crumbs stick to the skewer, the cake is ready.
Allow to cool in the tins for 10 minutes, then invert each cake on to a folded tea towel and then invert again on to a wire rack so the meringue is uppermost. (Alternatively, for loose-bottom tins, sit the tin on top of a can and gently push down the collar to free the cake.) Leave to cool completely. The cakes will keep for up to 2 days in a tin at this stage.

Beat together the mascarpone and sugar. Put spoonfuls of lemon curd over the mascarpone and swirl gently together. Set one cake on a serving plate and spread with the filling. Top with the other cake and dust lightly with icing sugar.


Sunday, 23 October 2011

One of the best things about the colder weather: A stew in the oven - Italian Lamb Stew.

Those who know me know I am particular about weather. I hate 'nothing' weather, where it's just grey, dank, gloomy, leaves glued to pavements, I also find it difficult to stifle my irritation as waves and waves of rain come in off the Atlantic and soak me. I understand it is a necessary evil, but seriously, you can keep your rain. Give me a hosepipe ban in Summer over a day in August watching the raindrops tap tap tap the windows.  However, the redeeming feature of living in England in the Autumn is the return of the stew, and it is a return that never gets old.  Blowing a gale and swirling rain outside? Check. Fire in in the front room? Check. Stew blipping away doing its thing on the stove or in the oven? Check.

I have adapted this recipe from Olive Magazine and suited it to my purpose. My hindrances were a lack of celery (which when I have to use, I have to blitz with the onion in my mini processor as my better half really dislikes the stuff. If he can't see it, he doesn't know it) a non functioning oven (it's ok now) and horror, the demise of the rosemary supply in my garden. I substituted thyme and oregano and it was perfectly fine. For that reason, I have put optional or put my additions in the recipe.

Do use olives. I think the stew needs them. The stew had a sweetness which though not unpleasant was tempered by the addition of the olives which don't taste as strong when cooked through. The effect was a rounding off of the flavours which left a tasty, warming dish. And if you ask me, the only accompaniment to have with this is mashed potato. A mountain of it.

The quantities here serve 12, but I divided the recipe by approximately two thirds for the four of us, rounding up ingredients rather than down where necessary. I did use two onions though, to make up for the lack of celery in my version and the fact that as a household, we are onion fiends.

2½ kg boneless lamb shoulder, excess fat trimmed         
4 tbsp flour, well seasoned for dusting
3 tbsp olive oil
3 onions chopped
4 stalks celery , diced (optional)
4 carrots , peeled and diced     (I used 2)                                      
4 garlic cloves , sliced (I used 2)
2 tbsp chopped rosemary leaves (or 2 tsp thyme and 2 tsp oregano, plus some parsley stalks)                                    
350ml white wine   (I used about 125ml)                                                                                            
2 x 400g tins plum tomatoes (I used 1 tin for the four of us)
20 black olives , pitted (I used the twenty, but I like olives!)
2 lemons , zested and juiced (I used 1 small lemon)
A small bunch flat-leaf parsley , chopped

Method

1. Heat the oven to 160C/fan 140C/gas 3, if using the oven. Cut the lamb into chunks and dust with the flour. Heat 1 tsp of the oil in a large casserole dish. Brown the meat all over in batches. Pour in the remaining oil, onions, celery, carrots, garlic and rosemary. Season and cook for 10 minutes. Add the wine, tomatoes and meat and bring to a simmer. Cover and cook for 2-3 hours.

(Alternatively, if using the top of the oven, follow the same instructions, then when the stew reaches the simmer point, cover and reduce the heat to low/medium and cook on a blip for about one and a half, two hours. Keep checking to make sure the stew is not boiling dry. After about an hour and a half I removed the lid and upped the heat to reduce the moisture in the stew a little).

2. Stir in the olives and lemon juice, sprinkle with the lemon zest and parsley and serve (with mashed potato or accompaniment of your choice)


Friday, 21 October 2011

Cherries and chocolate? Ok then. Chocolate Cherry Cheesecake Brownies


I am relative newcomer to brownies, (and their more enigmatic cousins, blondies) but the more I have baked, the better I have got in producing something which is just the right side of cooked, with a cracked top and a gooey, fudgy inside. As my confidence has grown, the more I have been inclined to experiment with the original and when I saw this recipe I decided that my days as a Brownie rookie were over.

I confess. The thing that attracted me to this is its 'Black Forest Gateau' take. The fact of the matter is that kitsch is good and a black forest gateau is the epitome of culinary kitsch. And Black Forest Gateau is good. Amazingly good. It would have been stupid not to have given them a try.

Chocolate Cherry Cheesecake Brownies

adapted from 'Baked in America' by David Muniz and David Lesniak
 

Ingredients:

For the chocolate batter:

4oz unsalted butter
12oz semi sweet (milk) chocolate
5 1/2oz plain flour
1 tsp baking powder
1/2 tsp salt
4 large eggs
12oz caster sugar
2tsp vanilla extract
1/2 tsp almond extract
6oz dried cherries

For the cream cheese topping:

4oz unsalted butter
8oz cream cheese
6oz caster sugar
3 large eggs
3 tbsp plain flour
1 tbsp vanilla extract or kirsch. (I used kirsch)

Method:

Preheat the oven to 180c.

Butter a pan measuring 12x9x2inches (or two tins that make up the same volume, which is what I did). Grease the tin and line with baking parchment.

Cream the butter, cream cheese together on a medium speed until light and fluffy then reduce the speed and add the sugar, eggs, flower and kirsch until smoothly combined. Set aside.

Melt the butter and the chocolate in a heatproof bowl set over a simmering pan of water then remove from the heat.

In another bowl, mix together the flour, sugar and salt.

Place the eggs and sugar in the bowl of an electric mixer and beat until light and fluffy. Gradually add the dry ingredients and mix until combined. Then add the melted chocolate mixture, plus the extracts, then stir until combined.

Spread half of the chocolate batter into the prepared tin. Smooth over.

Scatter the dried cherries evenly onto the chocolate batter.

Top with the cream cheese mixture.

Once topped, spoon on the remaining chocolate batter in lumps on top of the cheese mixture. Take a knife and swirl the chocolate batter into the cream cheese topping.

Bake in the oven for about 30 - 35 minutes until a knife inserted into the centre emerges 'sort of' clean. The top will be browned and will be slightly puffy. Do not overcook.

Let cool completely before chilling in the fridge for four hours. When cold cut into squares...or rectangles...or whatever suits you.


Thursday, 13 October 2011

Avec mes excuses à mes amis français ... C'est Clafoutis! Cherry, kirsch and white chocolate clafoutis.


I have been lucky enough to spend a little time in Limousin, in France, where this dish originates. I always feel that when I attempt something French, it has to be "la bonne chose" but then I discovered that French women have their own little ways of producing famous dishes that I decided I should be less hung up about it and be prepared to experiment a little. Which is why, when I saw this recipe, I had to try it and personally, I believe it to be the best clafoutis I have made to date. I used cherries, so faithful to the original recipe then, but I was intrigued by the seam of white chocolate which melted betwixt fruit and custard that, when cooked is not at the forefront, but I believe you would miss it if it wasn't there. I think it is also the first time I have cooked a clafoutis where the whole custard has been set, but earlier failures may be due to my ineptitude rather than 'recipe fail'.

The custard contains ground almonds. The recipe suggests that after letting the custard stand for a while, you put the custard through a chinois or other sieve. I didn't, and personally liked the slightly rough texture of the ground almonds in the custard. Each to their own if you ask me.

Cherry Clafoutis with Kirsch and White Chocolate (from 'Summertime' by Galton Blackiston)

Serves 6

Ingredients:

11oz large pitted black cherries (on this occasion I used good bottled cherries and it was pleasant enough. Cherries in season would be stunning)
4 tbsp kirsch
1 1/2 oz plain flour
2oz ground almonds
2oz caster sugar
3 eggs, beaten
4 tbsp melted butter, plus extra for buttering ramekins, or dish
10fl oz double cream, plus extra for serving
half a bar of good white chocolate (this equalled nine squares for me; I used Menier)
icing sugar, for dusting.

Method:

Place the cherries and kirsch in a bowl and leave to marinate for about an hour or so.

Meantime, prepare the batter: Place the flour, ground almonds, caster sugar, eggs, melted butter and double cream in a mixer and mix until thoroughly combined. Leave to settle for a little while and then pass through a sieve if you are of a mind to. I didn't.

Preheat the oven to 180c/Gas Mark 4

Place six, large well buttered ramekins (or use a big bowl like I did) on to a baking sheet.

Divide the cherries and white chocolate between ramekins, if using. or just put the cherries at the bottom of a big bowl and top them with pieces of white chocolate. Reserve the liquid from the cherries and add to the custard batter and mix well.

Pour the custard over the cherries and chocolate.

Bake in a preheated oven for about 35 - 40 minutes for ramekins, nearer an hour for one big bowl. You're looking for a light brown sponge like topping. If you think the top is browning but the centre isn't setting, lightly cover the top with foil and keep checking. This is what I did about 40 minutes into the cooking process.

When out of the oven, dust with icing sugar and serve warm, with cream.

Bon Appetit!

Wednesday, 12 October 2011

Some things are meant for sharing, and I am not the only one who is glad this was shared with me. Hershey's Chocolate Cake.


I love this cake, and so does everybody else. When I asked my friends on the Contessa's Kitchen website for a good birthday cake recipe, to a (wo)man this was the recommendation and for good reason. It's amazing. And easy.

So, recently I was on a mission. I had to create 'literary food'. Whilst Madeleines were the first thing to come to mind, and from my childhood, heart shaped cakes from 'The Little House on the Prairie, not to mention the intoxicating turkish delight from 'The Lion, the Witch and the Wardrobe', if there is anthing that is instantly gratifying, it's chocolate cake. So, with Michael Rosen's poem 'Chocolate Cake' firmly in my mind, I set to work, creating the cake that had made so many birthdays taste just that little bit better.

This is an American recipe, so you will need to acquire yourself some measuring cups, if you haven't already. An invaluable addition to any kitchen if you ask me.

Ingredients
2 cups sugar
1-3/4 cups all-purpose flour
3/4 cup HERSHEY'S Cocoa (though I use Green and Black's Cocoa, being on the wrong side of the pond)
1-1/2 teaspoons baking powder
1-1/2 teaspoons  Bicarbinate of Soda
1 teaspoon salt
2 eggs
1 cup milk
1/2 cup vegetable oil
2 teaspoons vanilla extract
1 cup boiling water
"PERFECTLY CHOCOLATE" CHOCOLATE FROSTING (recipe follows)

Method:

Heat oven to 350°F. Grease and flour two 9-inch round baking pans.

Stir together sugar, flour, cocoa, baking powder, baking soda and salt in large bowl. Add eggs, milk, oil and vanilla; beat on medium speed of mixer 2 minutes. Stir in boiling water (batter will be very runny; don't worry!). Pour batter into prepared pans.   


Bake 30 to 35 minutes or until wooden toothpick (or similar) inserted in centre comes out clean. Cool 10 minutes; remove from pans to wire racks. Cool completely.

Frost with "PERFECTLY CHOCOLATE" CHOCOLATE FROSTING.
                        
For the frosting:
1/2 cup butter, softened
2/3 cup cocoa (I used Green and Black's again)
3 cups icing sugar
1/3 cup milk
1 teaspoon vanilla extract
pinch of salt
Method:

In the mixer, beat together the butter and the cocoa.  Alternately the icing sugar and milk, beating to spreading consistency.

Add small amount additional milk, if needed. Stir in vanilla. Taste. It might need a touch of salt to bring out the chocolate flavour. (Seriously!)

I am no expert at frosting a cake. I thank the Lord that the homely look is quite appealing to most. My way of icing this cake was as follows:

Place smallish pieces of greaseproof cake under the bottom layer of the cake, so that they are poking out from underneath enough for you to pull them away later. (Reason: If you are icing the whole thing then any splodges and spills as you ice the cake can be pulled away on the greaseproof paper, leaving a neat presentation at the bottom of the cake when you have finished - a tip from the Barefoot Contessa, and I am forever in her debt).

Frost the top of the bottom layer, then place the top layer on top of the frosting to create the sandwich cake.

Frost the top of the cake first, then with a spatula, take the icing down the sides. Have a cup of hot water handy. You can dip the spatula in the hot water to clean the spatula off and ensure smooth(ish) spreading.

Once I have frosted the whole cake, I try to tidy it up by bringing the frosting upwards from the sides and spreading it in an even pattern towards the centre. I then decorate the cake with whatever I have in mind to hide the inevitable flaws. (A tip from the Hummingbird Bakery cookbook: Once again I am indebted!)

I decorated this with Maltesers. It was a triumph.

I haven't personally tried the variations below; but they are there is you fancy giving them a whirl:


VARIATIONS: ONE-PAN CAKE: Grease and flour 13x9x2-inch baking pan. Heat oven to 350° F. Pour batter into prepared pan. Bake 35 to 40 minutes. Cool completely. Frost.

THREE LAYER CAKE: Grease and flour three 8-inch round baking pans. Heat oven to 350°F. Pour batter into prepared pans. Bake 30 to 35 minutes. Cool 10 minutes; remove from pans to wire racks. Cool completely. Frost.

BUNDT CAKE: Grease and flour 12-cup Bundt pan. Heat oven to 350°F. Pour batter into prepared pan. Bake 50 to 55 minutes. Cool 15 minutes; remove from pan to wire rack. Cool

LinkWithin

Related Posts Plugin for WordPress, Blogger...