Lola and Finn's Mum

Lola and Finn's Mum

Sunday, 10 February 2013

Random Recipe Challenge, picked by Lola and Finn - Easy Tomato Soup and Grilled Cheese Croutons


As I enjoyed last month's Random Recipe challenge so much I was looking forward to taking part in the challenge once again. My method for randomness, I decided, would come in the shape of the two children to whom this blog is dedicated. So, Lola selected the book from the shelves...


Lola with her choice. Barefoot Contessa Foolproof
 
And Finn picked the recipe. (he's 5; he can't read too well just yet - so, totally random)


Finn with the chosen recipe. Easy Tomato Soup with Grilled Cheese Croutons
 
Now the irony wasn't lost on me that between the pair of them they managed to choose a recipe that neither of them like. Tomato soup has been an abject failure chez Lola and Finn on several previous occasions that I am not going to bother trying again until they are teenagers or something so once I saw the chosen recipe I laughed and immediately decided to half the ingredients and treat Phill and me to a Saturday afternoon lunch. And a treat it was. Unctuous yet sharp, with some pretty amazing croutons. The days of dunking ordinary bread may be over.
 
Anyway, much as it was a shame that Lola and Finn didn't have this soup for lunch (they had hot dogs and frankly, I don't blame them. If I had have been 5 or 6, that's what I would have chosen) I am very pleased that Lola managed to happen upon this particular cookbook, firstly because it was a Christmas present that I hadn't actually cooked anything from until now, and I knew that the recipe would turn out well because I have never made a Barefoot Contessa recipe that hasn't turned out anything other than brilliant. What else is pleasing is that Lola managed to avoid the Rosemary Conley 'Eat yourself Slim' cookbook, bottom shelf right. I may have to remove this tome of riotous high living and all round excess before next month, to avoid the possibility of having to cook something involving bouillon powder and egg white. Bletch.
 
Easy Tomato Soup and Grilled Cheese Croutons, from 'Foolproof' by Ina Garten
 
Serves 4 - 6 (I halved the ingredients below to suit two hungry people)
 
Ingredients (in cups, for it is an American recipe)
 
3 tablespoons good olive oil
3 cups yellow onions, chopped (2 onions)
1 tablespoon minced garlic (3 cloves)
4 cups chicken stock, preferably homemade
1 (28-ounce) can crushed tomatoes, (I used tinned cherry tomatoes)
Large pinch of saffron threads
Kosher salt and freshly ground black pepper
1/2 cup orzo
1/2 cup double cream
Grilled Cheese Croutons (see below)
 
Method:
 
In a large pot, heat the olive oil over medium heat.


Add the onions and cook over medium-low heat for 15 minutes, stirring occasionally, until golden brown.
 
Add the garlic and cook for 1 more minute.


Stir in the chicken stock, tomatoes, saffron, 1 tablespoon salt and 1 teaspoon pepper. Bring the soup to a boil, then lower the heat and simmer for 15 minutes.

Meanwhile, fill a medium pot with water, add 2 teaspoons salt and bring to a boil.
 
Add the orzo and cook for 7 minutes. (It will finish cooking in the soup.)


Drain the orzo and add it to the soup.
 
Stir in the cream, return the soup to a simmer and cook for 10 more minutes, stirring frequently.


Serve hot with Grilled Cheese Croutons scattered on top.

Grilled Cheese Croutons
 
4 (1/2-inch-thick) slices country white bread
2 tablespoons unsalted butter, melted
4 ounces Gruyere cheese, grated

Heat a panini grill. (I did mine in the frying pan - my panini maker is buried and I would have wreaked havoc in my newly tidied kitchen trying to unearth the bloody thing).


Place the four slices of bread on a cutting board and brush lightly with the melted butter, being sure to butter the corners.


Turn the slices over and pile Gruyere on two of the slices. Place the remaining two slices of bread on top of the Gruyere, buttered sides up.


Grill the sandwiches on the panini grill (or frying pan, pressing them down with a fish slice and turning them back and forth from time to time) for about 5 minutes, until nicely browned.
 
Place on a cutting board, allow to rest for 1 minute and cut into 1-inch cubes.


So, here I am, submitting this recipe to the February Random Recipe challenge hosted by Dom at Belleau Kitchen.


Saturday, 9 February 2013

Three ingredients: Pudding heaven! Pineapple - Brazil stylee!


Well, I presume so. I have never been to Brazil. I am going on the idea that I ate it in a Brazilian restaurant one time, and whilst I know this is a bit like gilding the lily because pineapple tastes glorious without embellishment, the addition of cinnamon and sugar caramelised a top of pineapple flesh is seriously, and I mean seriously, addictive. I feel the same way about this as I do about banana fritters, that's seriously high praise!
 
I'm linking this post to February 2013's Little Thumbs Up which is hosted by Zoe at Bake for Happy Kids and Doreen at My Little Favourite DIY. If you ever didn't know what to do with pineapple, then visit these sites for lots of ideas.


So, three ingredients - with it being just the three ingredients I think it is important that you get the best quality produce you can, and I am thinking about the pineapple here. it has to be ripe but not past its best. If it looks ropey it's probably because it is. I eyeballed the quantities of sugar and spice if I am being honest, probably using a couple of teaspoons of cinnamon and a couple of teaspoons of vanilla sugar. I used vanilla sugar for no other reason than I wondered if it would make a difference. I'll have to have it again without the vanilla to see if it does make a difference. What an awful job that will be...
 
Anyway, I won't bang on about it. Let the proof be in the pudding...
 
Grilled pineapple with cinnamon and vanilla sugar
 
Serves Lola, Finn, Mum and Dad
 
Ingredients:
 
Half a ripe pineapple, core removed and peeled, with all 'eyes' taken out.
2 tsp approx cinnamon
2 tsp approx (vanilla) sugar
 
Method:


Prepare the pineapple.


In a zip loc bag or something similar, add the sugar and spice and shake it around to combine the ingredients.


Put the pineapple into the bag with the sugar and spice and massage the ingredients a little to try to ensure even distribution of the cinnamon, etc.
 
Put the bag into the fridge for about an hour.
 
When ready to cook, preheat the grill to high.
 
Place the pineapple under the grill and allow to caramelise, turning once or twice to ensure even browning.


When the pineapple is hot and the coating has caramelised (and your kitchen smells good!) they are ready to serve.


You could cut these up into chunks and eat them with a toothpick couldn't you? Or you could dollop a scoop of vanilla ice cream (or even better coconut ice cream!!!!) next to it and transport yourself to pudding heaven!

Friday, 8 February 2013

Tea and cake? Yes please! Masala Chai fruit tea loaf


Afternoon tea eh? All us Brits do it, Sat around about 4pm, with the best china out, little fancies and crustless sandwiches delicately placed on floral 'cake plates' and all is well with the world...
 
Well, it would be nice if it were like that but most of us are working ourselves into the ground at that point for employers who think it's fine to treat their employees with a shocking amount of disrespect, or else we're arguing with children who have just come home from school and are at once ravenous and rejoicing at slipping out from under the school's thumb for the last six hours. But, it's a great idea in principle. We should make time for cake. And tea. And here we have both, in the shape of a Masala Chai tea loaf which is really simple to make and tastes lovely. And it keeps well if you wrap it. Acually it's that richly fruity that I reckon you could pile a load of marzipan and royal icing on it and call it a Christmas cake if it were the twenty something of December and you had forgotten or couldn't be bothered starting to soak your currants sometime in October.
 
Anyway, this cake grew out of my total adoration of Tamasin Day Lewis' Earl Grey Fruit Tea Loaf which is in her book 'Supper for a Song'. I have made it many times with both Earl Grey (I had a lavender infused Earl Grey Twinings tea which was really nice) and Lapsang Souchong which made it fruity and smoky if that is at all possible. But it was my encounter with Masala Chai in Tesco (Yes, I know. Don't buy the burgers...) that got me thinking that it might be a heady and spicy twist on what was already a really nice cake. So, I tried it, and yes, it's nice! Not overly spicy and heady, but there's enough there to make it warming and different. And I like drinking Masala Chai now, in case you were wondering...
 
This is a very easy cake if you remember to soak your fruit preferably overnight or else for a good few hours before you start to make the cake. I think if you buy the best dried fruit that you can, then it does add to the texture of the cake, mainly because there is more of a selection of dried fruit rather than just currants. Not that I would ever dream of telling you what to do, but I bought 'luxury dried fruit' from Aldi to do this. It was £1.49 and it had alsorts in it, including dried pineapple and glace cherries. Bit of a bargain really, compared to what you could pay.
 
Masala Chai Fruit Tea Loaf, adapted from Tamasin Day Lewis' Earl Grey Fruit Tea Loaf in 'Supper for a Song'.
 
mkes a 900g loaf

Ingredients:
 
400g mixed dried fruit (try to buy the best you can that gives a good variety of fruit)
120g dark muscovado or molasses sugar
300 ml hot strong masala chai tea (I used two tea bags and let it stew for about 10 minutes)
225g self-raising flour
1 large free range egg, beaten
 
 
Method:


Put the dried fruit and sugar in a bowl, pour over the hot tea and leave overnight if you can or for at least 6 hours before you start to make the cake.

Stir before you go to bed and again before you use.
 
Pre-heat the oven to 180c/Gas 4. Grease and line 1 x 900g loaf tin.


Sift the flour over the fruit in the bowl and add the beaten egg then fold everything in together.


Spoon the mixture into the prepared tin and bake for 1 hour (A BIG NOTE: the first time I made this, I found that the top burnt before the middle was cooked because it was so dense, and the high sugar content might not have helped. My advice is, loosely cover the top with foil for the first 40 minutes of cooking and then take it off to allow the top to brown and cook. Keep checking for doneness but you might find it takes longer than an hour. Just be vigilant).

If the skewer comes out clean the loaf is cooked, though it may take up to another 15 minutes depending on your oven.


Cool in the tin on a wire rack before turning out. Wrap in greaseproof and foil and store in a sealed container, it keeps well for a couple of weeks. And eat a slice with a cup of tea. Often.


Wednesday, 6 February 2013

Giving a meal from the distant past a 'Little Thumbs Up': Chicken Pineapple


I can't really say that I led a particularly adventurous culinary childhood as my dad was, shall we say, conservative in the food he liked to eat. He still is, though now, in his mid sixties, he is getting a little more adventurous and in recent years has tried both garlic bread AND pizza and thought they were okay. So, I was brought up on good, solid, traditional British food and that was fine. British food is really nice. I defy anyone not to be gratified by eating fish and chips and sticky toffee pudding. Yum, frankly.

However, the meeting of my first boyfriend at 17 meant that a different set of tastes opened up to me, in the shape of actually buying Chinese food from the chippy! Who knew?! Anytime we went to the chippy it was for chips and all those numbers and exotic sounding dishes on the board behind the counter were for other people. In the spirit of impressing me, maybe, and me impressing him by acting like I knew anything about it, my boyfriend bought chicken pineapple and fried rice to take home to eat and we shared it in his parents' front room, watching 'Lethal Weapon'. Yes, I know what you're thinking. Romantic.

Anyway, that boyfriend has long gone but my love for chicken pineapple still remains. So much so that when I was musing about cooking chicken pineapple for the family and in so doing, this blog post, Phill reminded me that this was the dish I ordered from the chippy the evening of our first date. And to be honest it was the first thing I thought about when I read that Zoe at Bake for Happy Kids and Doreen at My Little favourite DIY were starting the Little Thumbs Up blog hop and that the first ingredient was pineapple. Any excuse to recreate the dish for my children.


The recipe I am using is one that I found on Food.com which I have altered a little to suit my tastes and store cupboard. And as well as being healthy, it is lightening quick to make and I have to wonder to myself why I don't stir fry more often, especially on work nights where I crash through the door at 5pm with a mind and body lacking interest and two kids who are ravenous. Get the wok out, Stella!
 
Anyway, here we are - the recipe, with my adaptions in red:
 
Chicken Pineapple, adapted from the recipe on Food.com
 
Serves Lola, Finn, Mum and Dad generously!
 
Ingredients:
 
1/4 cup soy sauce
2 tablespoons sugar
1 tablespoon cider vinegar (I use rice wine vinegar) 
1 tablespoon ketchup
1/2 teaspoon ginger
1 tablespoon finely chopped garlic
1 teaspoon cornflour
1 lb boneless skinless chicken breast, cut into 2 inch strips
2 tablespoons vegetable oil
A handful each of baby corn and mange tout (or whatever stir fry veg you like)
1 (8 ounce) can pineapple chunks, drained, reserve 1/4 cup juice (If you are in a world of metric, or British, I use a 227g tin of pineapple chunks)
Method:


Mix first 7 ingredients with reserved 1/4 cup pineapple juice in small bowl to create a sauce that you will add towards the end of cooking.


In large frying pan or wok, stir-fry chicken in hot oil 5 minutes. (I like mine to colour quite a lot to create a bit of chicken-y crust but each to their own)


Add your vegetables and then stir-fry 4 more minutes.


Stir in the pineapple and sauce and heat through. I also have a bit of a taste of the sauce to see if it requires any more seasoning.


Serve over rice with a sprinkling of coriander, if you like.


Saturday, 2 February 2013

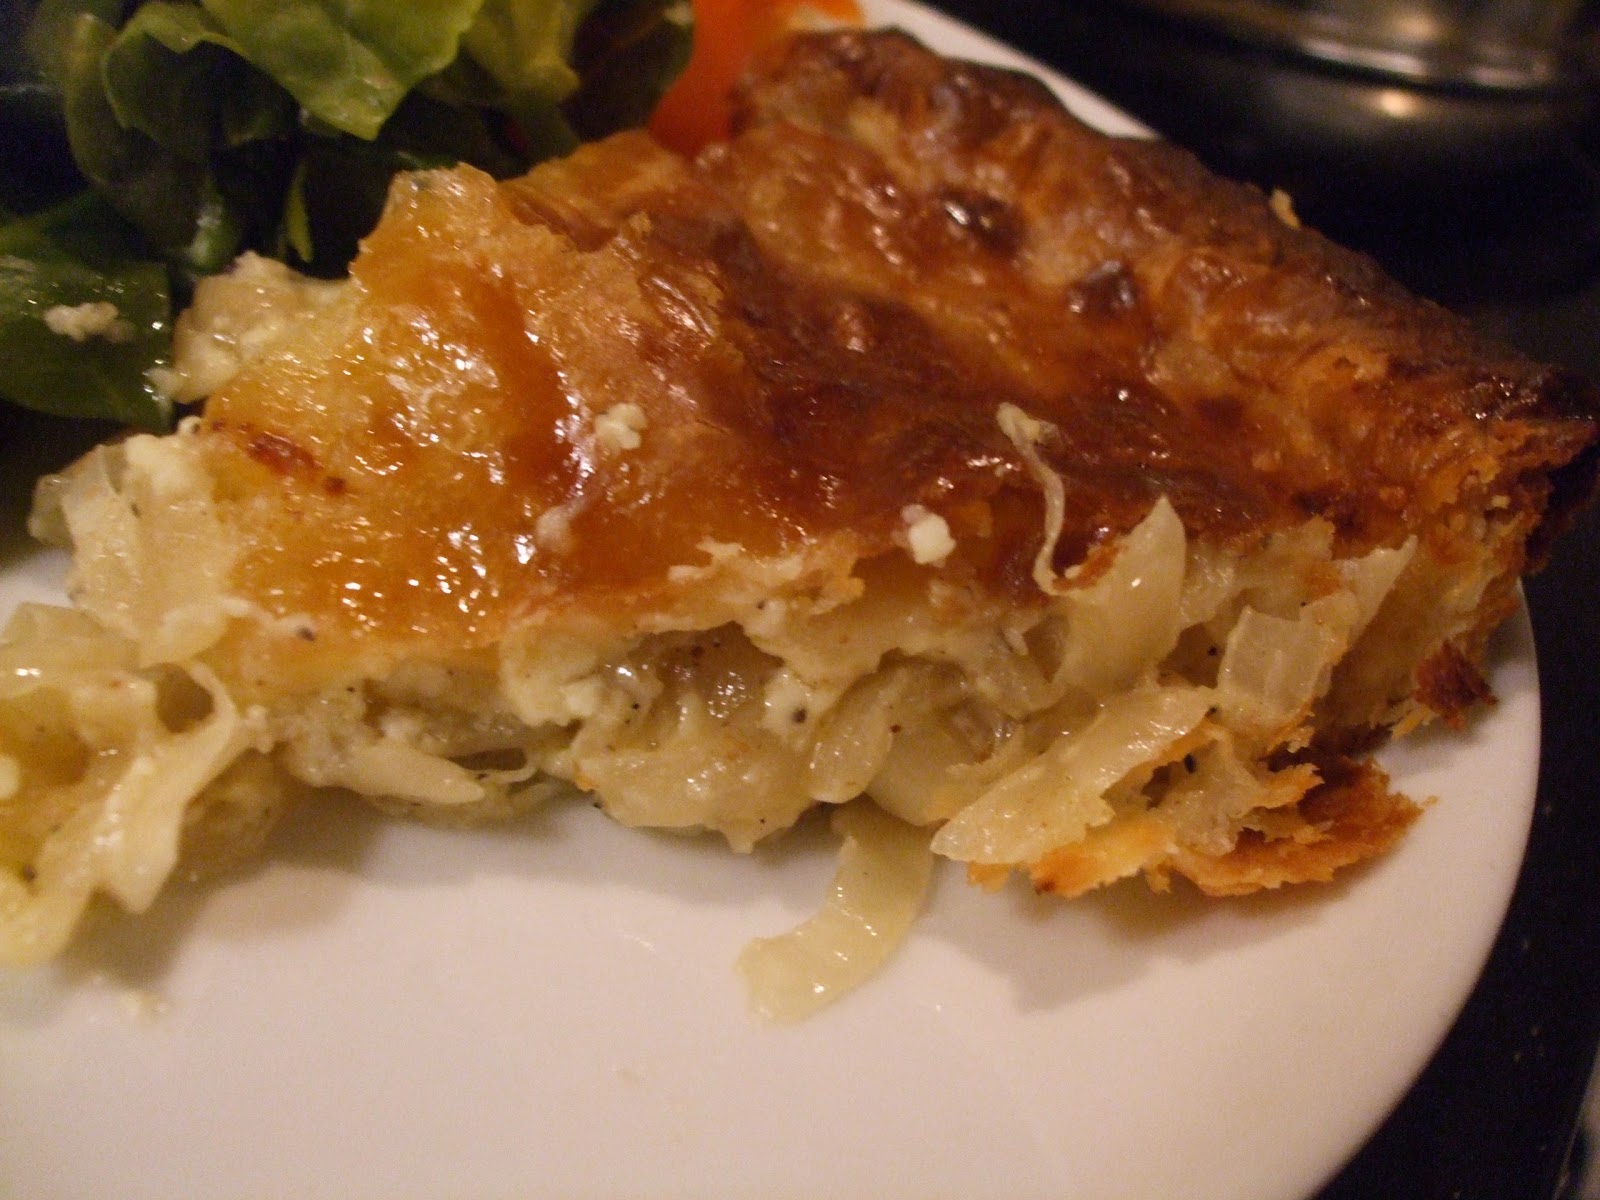
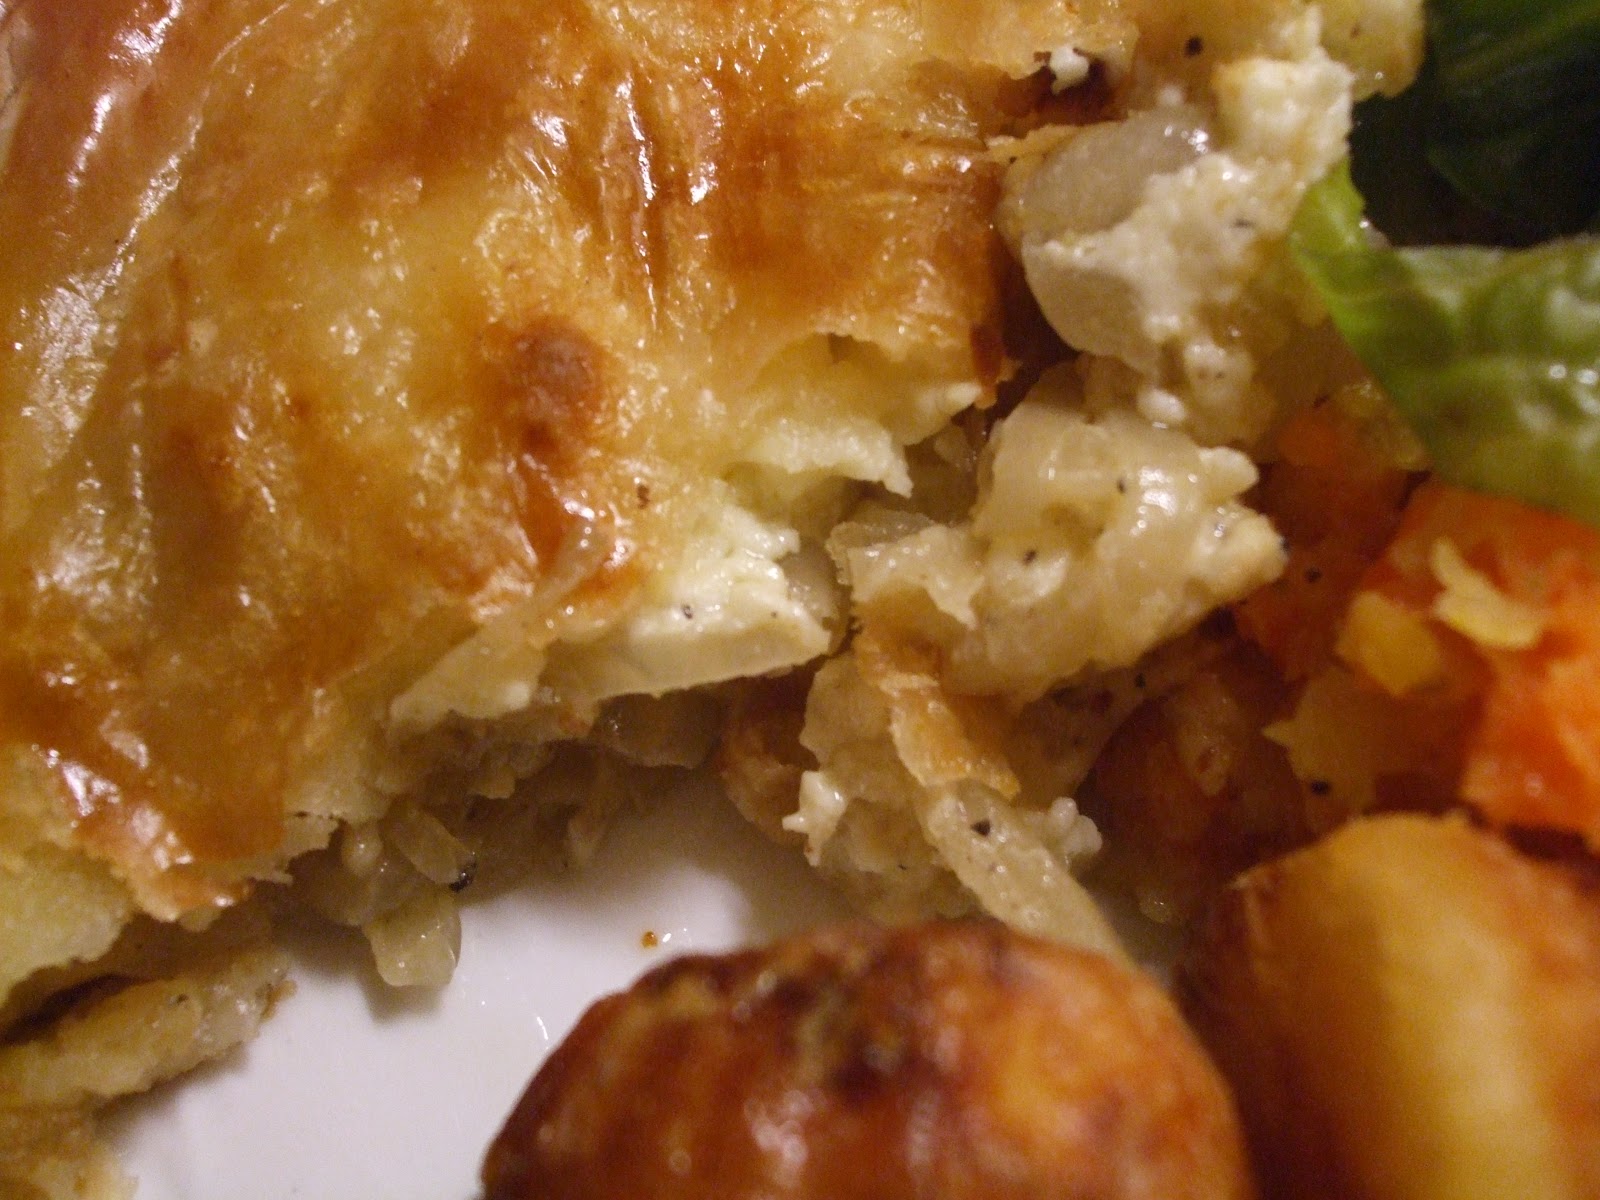
Recreating perfection - Lancashire Cheese and Onion Pie


So, Phill's birthday came around again and because he is notoriously difficult to buy for (I ended up buying him a winch. Don't ask...) I decided to cook him a meal of his choice. Cooking something special for someone is a great present to give, if you ask me. Anyway, I have already tried to take Phill back to his Aunt Renie's cooking by trying to make a cheese, onion and potato pie which was really, really nice but not quite like his Auntie Renie. Now, there is an argument that I would never quite make it, but that doesn't mean I shouldn't try, so, some people on their birthday get diamonds, a sports car - Phill gets a cheese and onion pie. But it WAS as good as his Auntie Renie's, so he says. Unless he was just being kind...
 
Phill's observation was that when I put mashed potato in the original pie to bulk it out, it took away from the cheese and onion flavour, which I suppose is correct. Phill likes really strong flavours. After watching Simon Hopkinson on his show, 'The Good Cook' cook a Lancashire cheese and onion pie, and Phill salivating whilst he was making it, I decided to try this recipe. It uses Lancashire cheese, which, I confess, is not my favourite, but when it was cooked with the onions it mellows a little and produced a beautiful, creamy but sharp, oniony filling. Yum, frankly. And seeing as he is a Lancashire chap, really quite apt.
 
I have included the pastry recipe below. I confess I used some shortcrust pastry that I had frozen months previously. Whisper it - I bet you could buy some shop bought decent pastry to do this with, especially if pastry frightens you. It still makes me a little bit scared...
 
Cheese and Onion Pie, adapted from Simon Hopkinson's 'The Good Cook'
 
Serves Lola, Finn, Mum and Dad plus one other, generously
 
My adaptations in red
 
Ingredients
 
For the pastry (which I didn't make as I had some shortcrust already made)
 
60g/2oz butter, cut into small pieces
60g/2oz lard, cut into small pieces
200g/7oz self-raising flour, plus extra for dusting
pinch salt
 
For the filling:
 
25g/1oz butter
3 onions, roughly sliced
salt and freshly ground white pepper (I used black - I quite like black specs of pepper!)
250g/9oz Lancashire cheese, coarsely grated
milk, for sealing and glazing (I used a beaten egg)
 
Method:
 
Preheat the oven to 180C/350F/Gas 4 and place a baking tray in the oven to heat through.
 
For the pastry, place the butter and lard into a large bowl with the flour and salt. Gently rub the fat into the flour using finger tips until the texture resembles very coarse breadcrumbs. Alternatively use a food processor to bind the fat and flour.
 
Add 2-3 tbsp ice cold water to bind the mixture. Lightly knead the dough until well amalgamated, dust with flour and place into a sealable plastic bag. Chill in the fridge for 30 minutes before using. If you are in a rush, you can use the dough straightaway.
 
Or - use some pastry that you might already have, like I did, or buy some ready made.
 
For the filling, heat the butter in a saucepan and fry the onions for 10 minutes, without colouring.
 
Stir in 150ml/5fl oz water, salt and freshly ground black pepper and cook until almost all the liquid has evaporated. Remove the onions, spread out onto a plate and set aside to cool.
 
Roll out two-thirds of the pastry until it is about 0.5cm/¼in thick and line a greased 20cm/8in loose-bottomed tart tin, leaving any excess pastry overhanging the edge.
 
Now roll out the remaining pastry to a similar thickness which will also be generously wide enough to use as a lid to the pie. Cover the base of the pie with half of the onions and then cover with half the grated cheese.
 
Repeat the layering process until all the mixture is used up.
 
Roll out the remaining pastry to make a lid for the pie. Brush the edges of the pastry case with milk to seal the pastry lid upon it, while also pressing the edges together lightly before trimming off any excess overhang.
 
Brush the surface of the pie with milk (or egg). Make three small incisions into the centre of the pie using the point of a sharp knife and, if you wish, further decorate to make a lattice effect.
 
Place the pie into the oven and bake for 40-50 minutes, or until golden-brown. Remove from the oven and leave for a good 20-30 minutes before un-moulding and cutting into generous wedges.
 
with roast potatoes and cabbage!!!
 
 
Serve the pie warm or at room temperature (not piping hot).
 
Apologies for the lack of 'method' photos. I am, what I call, 'between cameras', and I deleted the method photos. Stupid woman.


Friday, 1 February 2013

Not a looker, but tastes pretty good! Pear and Nutella Tart (or Tarte Poire et Nutella)


Why the French in the title? Am I showing off? Yes No, it's because I have been mooching through the Marmiton website again for reasons such as practising my French and looking for inspiration for a store cupboard pudding, and this is pretty store cupboard to be fair. And it's also really tasty, despite it's what I will describe as 'piebald' appearance, reminiscent of the gypsy cobs of my youth and my history, for part of my ancestry is a little exotic and there is a wanderlust which I cannot deny. Where was I? Oh yes. Piebald. I think that it will be some complicated chemical reaction which I don't understand between custard and Nutella which means that the filling looks blotchy but as I like custard and I like Nutella I really couldn't care less. It tastes lovely. But then I defy anything to taste awful if it has Nutella in it. I mean, how is that even possible?
 
This pudding is very easy to knock up if you have some ready made pastry, which I did because of my pastry 'stash' in the freezer. I used French pate brisee for this tart and it worked wonderfully well. And as for the Nutella, well at least this time I had an excuse to eat a spoonful or two of it because of the premise that I was baking with it, rather than my being stood with the cupboard open, tablespoon teaspoon in hand, surreptitiously getting a Nutella fix. Result!
 
 
My spoonful! And it was enjoyed!
 
Pear and Nutella Tart, translated and adapted from Tarte Poire et Nutella, from the Marmiton website
 
Ingredients:
 
A roll of shortcrust/sweet pastry (shop bought)
2 - 3 tbsp Nutella
Large tin of pears (You might have a couple over)
2 tbsp caster sugar (or to taste)
2 eggs
A glass of milk (I used about 200ml)
plus extra granulated sugar for sprinkling after baking.
 
Method:


Place the pastry into a loose bottomed tart tin (I used a 20cm/8" approx one).


Spread a layer of Nutella on the pastry.


Cut the pears into pieces, put them on the Nutella. (Mine were halves, so I left them as they were).


Beat the two eggs, and milk together. Add a little of the sugar to taste if you like.


Put the mixture around the pears (they should not be completely covered).


Bake at 180 ° C about 1/2 hour, or until the custard has set.
 

A little before removing the tart from the oven, sprinkle with sugar.


LinkWithin

Related Posts Plugin for WordPress, Blogger...