Lola and Finn's Mum

Lola and Finn's Mum
Showing posts with label bread. Show all posts

Wednesday, 18 December 2013

I really should have thought of this far earlier - Jam Butty Pudding


Given my refreshing sense of laissez-faire when it comes to life (This is my kind way of saying 'can't be arsed') I seem to have three half used jars of jam randomly arranged on my worktop and half a loaf of stale bread, because I didn't wrap it up properly, and I could have made toast and jam, but this is so predictable. Instead I decided to make it far more unhealthy by encasing the aforementioned bread and jam in a creamy vanilla custard, therefore creating, if you will, jam butty pudding.  If you are not from these parts,'butty' means 'sandwich' and 'pudding' means 'something glorious' ... probably.
 
I could have taken the crusts off I suppose, but personally I kinda like the way they crisp up and create that wonderful textural contrast between crunch and softness. And you could use any old jam you like. This just happened to be strawberry but, you know, I could be persuaded to use any jam. I think I would like to use the quince jelly I have, which means I'll have to buy even more of it when I next go to France. Shame.
 
I made this so it would be a set custard, so I was working on 100ml of liquid to one egg and I did this because I wanted to pour a little cream over when I served this. I was thinking crunchy, soft, warm then cold. If you wanted to, you could increase the liquid to egg ratio for a more liquid custard. I only added about 30g of sugar because I wanted the jam to be the sweetness, but that is all about personal taste. You could also cook this, bain marie style but I'll be honest, due to my liking of laissez faire, I just bunged it in the oven with some foil on top for about 30 - 40 minutes or so, then checked if the custard was starting to solidify, which it was. Then I removed the foil and let the top brown for about 15 minutes or so.
 
By the way, if by some peculiar notion you happen to have leftovers, this is really quite nice the next day. Let's just say that I have eaten breakfasts that are far, far worse...
 
Jam Butty Pudding
 
Ingredients:
 
Six to eight slices of stale, white bread
Half a jar of jam (I used strawberry)
150ml double cream
150ml milk
3 eggs
a vanilla pod (you could use extract)
30g sugar (or to taste)
 
Method:
 
Preheat the oven to 180c


Make jam sandwiches (take the crusts off if you want)


Cut the sandwiches into triangles that will fit snuggly into an ovenproof dish. Arrange them so that they sit in the dish reasonably tightly.


Meanwhile to make the custard, mix the liquids, the eggs and the sugar together. Slit the vanilla pod and scrape the seeds into the mixture. Then put the vanilla pod in. (or just use a tsp of extract).


Pour some of the custard mixture over the sandwiches and allow the bread to absorb it. Then pour the rest of the custard over.
 
Place the dish on a tray and cover with dish with foil. Place in the oven for about 30 - 40 minutes. Check the pudding round about 30 minutes to see if the custard is beginning to set. Take the foil off for the last 20 minutes or so to brown the top, but keep an eye on it as it could burn quickly.
 
Once you're happy with the colour, take the dish out of the oven. The pudding should appear quite puffed but will sink once it comes out of the oven.


Serve warm, with a splosh (or more) of cream.


Friday, 10 May 2013

A random reason to eat your crusts: Coconut Milk Bread


Oh, how have I neglected my little blog of late. April has been almost devoid of food musings due to the double distraction of 'spring cleaning and decluttering' (kinda good) and marking A level coursework (not so good) and whilst I still have an attic full of (Phill's) stuff that needs to be acquainted with the tip, the coursework is done and dusted and I can indulge in something more gratifying and therapeutic.

So, therapeutic. I have already talked about the therapeutic and frankly nurturing qualities of making bread. From the 10 minutes of kneading in which you can take out all your irritations, to the prove, to the knock back, to the smell of baking bread and the tap of a hollow bottom, making and baking bread is good not only for bingo wings but it is good for you. Totally.


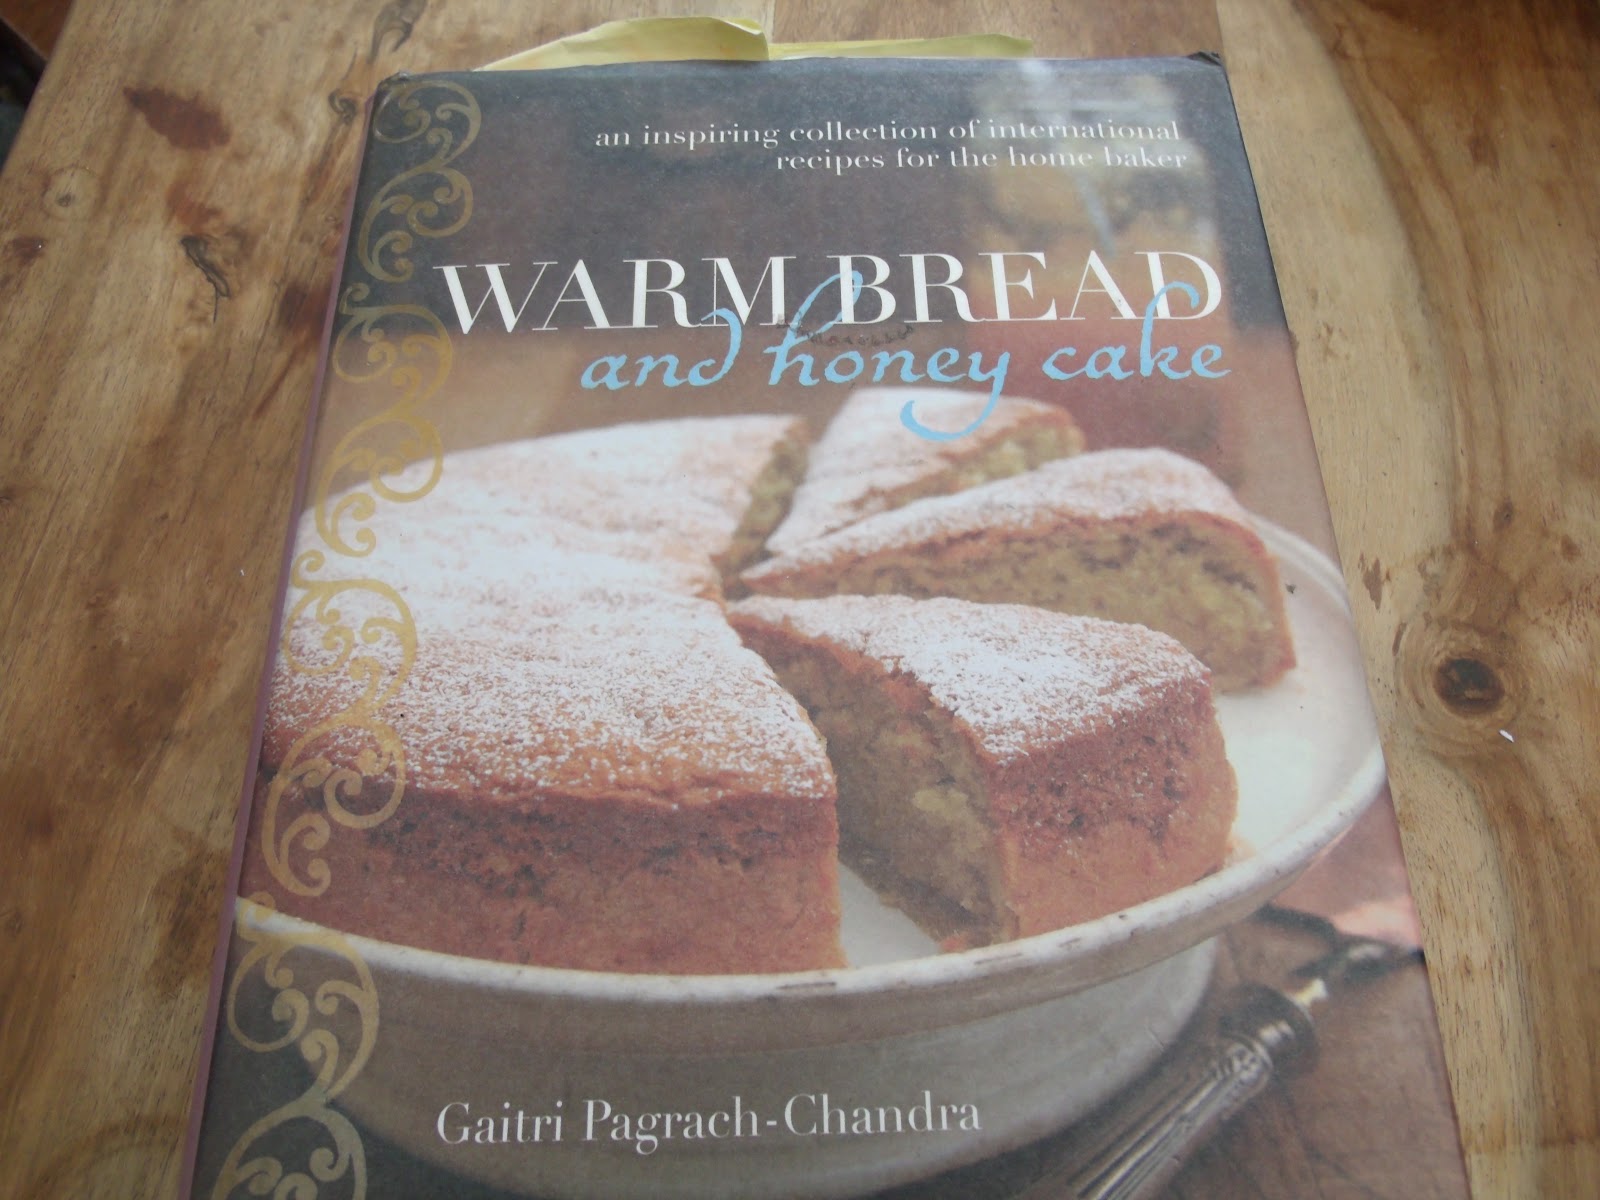
And it was great to bake bread for this month's random recipe challenge hosted by Dom at Belleau Kitchen. The randomness proved a bit difficult as I have two (mostly) bread books and then I have lots of books with the odd loaf knocking around in them, so to save myself from going mad I picked the one I have never cooked anything out of and opened the book:


The book: Warm Bread and Honey Cake by Gaitri Pagrach-Chandra


And here we are: Coconut Milk Bread.

What can I tell you about this loaf. Well, it didn't seem to rise a tremendous amount on the first proving but after being knocked back and put into tins it did seem to get its act together. The bread tastes amazing. There will be some kind of scientific reasoning that means that the ingredients combine to create the best crusts ever, or else I maybe left it in too long, but if you are a crusts girl (or boy) like me, you will not be disappointed. And the texture and taste is 'filling' but with a creamy and slight saltiness that is just so, so good. I took advantage of the cook's perk of slicing a piece whilst still warm and slathering it in some butter. It was at that time I realised that a life without bread would be, frankly, crap.

So, here you go. the recipe.
 
Coconut Milk Bread taken from Warm Bread and Honey Cake by Gaitri Pagrach-Chandra
 
Makes (450g/1lb) two loaves
 
My adaptations in red
 
Ingredients:
 
750g strong white flour
2 1/2 tsp easy blend (active dry) yeast
3 tbsp sugar
1 1/2 tsp salt
100g butter, melted and cooled slightly
350ml lukewarm coconut milk (Note: I added my coconut milk straight from the tin into the melted butter to cool the butter and make the coconut milk lukewarm, if that makes any sense!)
 
Method:


Put all the ingredients into a large bowl and mix to combine the ingredients and then knead weither by hand or with a dough hook in a mixer until the dough becomes smooth and supple.


Bring together into a ball and put in an oiled bowl, cover with cling film and leave to rise until it is doubled in size. (Took about an hour and a half for me)


Knock back the dough and and knead lightly until smooth again. Divide into two portions, roll with your hands into a ball type shape and place into prepared loaf tins, seam side down. Cover both loaves and leave to rise once again until doubled in size.
 
Preheat the oven to 200c/400f
 
Crusts!
 
 
Bake in the oven for about 30 minutes. To test, remove the loaves from the tins, tap on the bottom and top and they should sound hollow. Cool on a wire rack.


Thursday, 21 March 2013

A meal for Finn - Mediterranean Meatballs with Tomato and Basil Sauce.


My son Finn. In some ways he is very obvious and then there are times when he has me completely flummoxed. I mean I suppose this keeps me on my toes and stops life being dull but trying to feed him is a bloody nuisance. Given the chance, the boy would exist on a diet of chicken nuggets, spaghetti bolognese, eggs in any form and a selection of yoghurts until the end of time, so not what you would call adventurous. And then he will quite happily polish off mussels, (Moules Mariniere in Honfleur, last Summer, ate every last morsel), prawns and the most recent revelation, caviar(!) when we were at a party recently. He eats caviar but won't eat carrots. Maybe he just has a more discerning palate, or else he just likes seeing his mum put her head in her hands when he declares for the umpteenth time that he "doesn't like it. It's too spicy..." Spice for him means flavour - he'll call it spicy when no spice has been anywhere near it. Strange boy!
 
Finn - being discerning; Lola rocking out by the looks of it...
 
But here is a gem. I made this and he cleared the plate. I should have taken a picture of it, because it's a gastronomically momentous event. I mean, I know this dish isn't much of a departure from the spaghetti bolognese that he enjoys but it is different and that is not always a good thing.  If it doesn't look right then it isn't right., to Finn.
 
This recipe is from what I have in my mind as one of the first grown up cookbooks that I bought. I can't really quantify for you what a grown up cookbook is really, save for the fact that in my own mind it is full of the recipes of one writer/cook and it was recommended in the book review section of The Times. This bit may or may not be relevant. Anyway, what I am trying to say is that the cookbooks I had before were perfectly fine bargain basement generic collections of recipes like 'Italian' or 'Desserts' or something and this book was the first had more of a personal aspect. Or something.
 
Anyway, for Finn... and I will cook it you again soon babe, and for you the recipe:
 
Mediterranean Meatballs with a Tomato and Basil Sauce, adapted from the recipe in 'The Fish Store' by Lindsay Bareham
 
Serves Lola, Finn, Mum and Dad and one other
 
My adaptations in red
 
Ingredients:
 
1 large onion

50g butter

Half tsp thyme leaves

400g can chopped tomatoes

1/2 tsp sugar
 
salt and pepper taste

20 basil leaves

15 pitted black olives

1 thick crustless slice of bread

Milk or thin cream for soaking

1 egg yolk

500g minced lamb

1tsp oregano (my addition)
 
salt and pepper to taste

400g linguine

Chunk of Parmesan to serve
 
 
Method:


First make the tomato sauce. Saute the onion in the butter until it's translucent, about 5 - 10 minutes, then add the thyme. Cook for another couple of minutes and then remove half of the onions to a mixing bowl where you will eventually combine the meatball ingredients.


Add the tinned tomatoes and stir to combine. Simmer the sauce for about 10 minutes.


Shred half of the basil and add it to the sauce.
 
Finely slice the olives. The original recipe suggests adding the olives to the meatball mixture but I didn't - I added them to the sauce so I could still have an olive dimension to the dish but pick the offending beings out when I served Lola and Finn's helping. If you want to add the olives to the sauce like I did, now you can. Lola and Finn hate olives, me and Phill love them!


To make the meatballs, soak the bread in the milk until the bread absorbs the liquid. Squeeze the bread and then break it up into little. Combine the bread with the reserved onions, the rest of the shredded basil, the olives if you are using them, the egg yolk, the oregano and the lamb mince. Season with plenty of salt and pepper. Mix with your hands and then form the mixture into balls.


When the balls are made, put them into the bubbling tomato sauce mixture and allow them to poach. The balls will render some fat which will leech into the sauce and make it a little richer.
 
Poach for about 8 - 10 minutes. Meanwhile, cook some pasta according to the packet instructions.


Serve the meatballs and sauce over the pasta with a few torn basil leaves and a sprinkling of Parmesan.


Saturday, 5 January 2013

Bread and cheese? Together? Sounds brilliant to me. Panini al Gorgonzola, or Gorgonzola and Walnut Rolls


A little anecdote to set us off. I was thinking about the way that I really now enjoy making bread, now I seem to make stuff that does indeed resemble a loaf rather than a sponge, and it seems a far cry from the conversation that I had about 15 years ago with an English adviser who had come into the school where I was working to 'advise', as in 'state the bleeding obvious and get paid £300 for doing so', and whilst she was telling us things that we already knew, she was also waxing lyrical about the joy of making her own bread and asked me if I made my own. I looked at her with more than a little bewilderment and told her that no, it was easier to buy it from Tesco (other supermarkets are available) and that my time was taken up by ploughing through paperwork with a little bit of marking to justify the fact that I teach for a living. Yes, I started off bolshy and have progressively got worse. She merely smiled. She had time to make her own bread. Or, if she was far too busy, she made time.

And, she was right. Fast forward 15 years and here I am, dabbling in bakery and making the odd loaf here or there. Out of all the recipes I have made, the meals I have produced, the cakes I have frosted, I get no better satisfaction from making bread. It must be the rigorous involvement of kneading, plus the nurturing glances at the dough as it rises and then, to top it all, the smell as it bakes. Glorious.

So, this recipe, like many of the others, is from Gino D'Acampo's 'Italian Home Baking' and it combines two ingredients which were made for each other, Gorgonzola and walnuts. It produces a taste which is all at once nutty with an almost spicy then creamy hit of Gorgonzola. I got Lola and Finn to dip these rolls into tomato soup, once they got a bit past their best, but at their best, with a little prosciutto and a icy cold glass of wine, really, really heavenly.

So, when it comes to making bread, now I make time. It's worth it.

Panini al Gorgonzola, or Gorgonzola and Walnut Rolls, from 'Italian Home Baking' by Gino D'Acampo

Makes 12 rolls

Ingredients:

350g strong white flour, plus extra for dusting
350g wholemeal flour (I used spelt flour)
7g fast action yeast
1 tsp salt
200ml full fat milk, warm
250ml water, warm
180g Gorgonzola cheese, cubed
90g walnuts, roughly chopped
olive oil for brushing

Method:

Brush two baking trays with oil.


Combine the flours, the yeast and the salt together in a large bowl. make a well in the centre.
 
Pour the milk and the water and mix the ingredients together to form a soft dough.

Dump the dough onto a floured surface and knead for about 10 minutes or so.


Work the Gorgonzola and the walnuts into the dough and return the dough to the bowl. Brush the top with some oil and cover with cling film. Allow the dough to rise in a warm place away from draughts for about an hour.


When risen, turn out the dough into a lightly floured surface then divide the dough into 12 equal sized balls. Place on the oiled baking trays, putting space between each roll to allow them to rise once more. Brush with oil and cover with cling film and allow them to rise for a second time. This time, for about 45 minutes.

Whilst the rolls are rising, preheat the oven to 220c, Gas 7.

Remove the cling film and bake in the middle of the oven for 20 minutes until golden brown.


Remove from the trays and leave the rolls to cool slightly on a wire rack.


You can eat these warm. And why wouldn't you? And then you can eat more of them when they have cooled further.

Saturday, 24 November 2012

Flippin' Fabulous Focaccia! - Focaccia Con Pancetta e Cipolle, of Focaccia with Crispy Pancetta and Onions


I am so loving making bread at the moment. I really can't put my finger on why but I out of all the cooking disciplines that might exist, making and baking a loaf of bread gives a real boost to this person's culinary ego and, cliche ridden though it may be, it's hard not to feel some sort of heart warming emotion as you carefully remove your loaf from the oven, all risen and golden and smelling just divine. If you're anything like me you are nicking a bit off the side with a knife before it is even cool enough to eat, but that's bread for you. It's the staff of life and if you are not on one of those carb free diets, (perish the thought!) then bread makes you extraordinarily happy.
 
Regular readers of this blog may know that some of my recent bread making exploits have come from 'Italian Home Baking' by Gino D'Acampo and this is also one of his wonderful recipes. I had intended to just make his Gorgonzola and walnut rolls but a flick over a few pages and this recipe was just 'speaking' to me. What the hell, I'll make both. So I did. I am sure the rolls will make an appearance in a blog near you sometime soon, for they were also gorgeously tasty and sustained me this week by being dunked into soup whilst on my lunch break. But more of them another time.
 
I think this is the best bread I have made in a long time. I think, on occasion, my bread is sometimes a little doughy but I am still very much a novice and I know that there is so much nurturing and cajoling needed to produce a decent loaf. This one though had an amazing texture, heavier than anything you might buy at the supermarket but not oppressively so. I think 'satisfying' is the word I am looking for. The addition of the bacon and the onion was to die for. My mum used to make cheese and onion bread in terracotta pots (no wonder I am deranged) and the way that the sweet sauteed onion almost melts into the bread is seriously divine. Amazingly good. And even when the bread is no longer warm it is a joy to eat. I spread some soft cheese on it and I was happy all over again.
 
Make this bread. It's 'buonissimo!' And Lola and Finn were crazy for it too.
 
Focaccia con Pancetta e Cipolle, or Focaccia with Crispy Pancetta and Onions, from 'Italian Home Baking' by Gino D'Acampo
 
Serves about 10 if you've a crowd coming round.
 
Ingredients:
 
2 tbsp salted butter
250g diced pancetta
1 large onion, finely chopped
7g fast action yeast (one of those sachets, basically)
6 tbsp extra virgin olive oil plus extra for brushing
300ml of warm water
2 tsp fine salt
1 tbsp sea salt
 
Method:
 
Start by brushing a large baking tray and a bowl with oil.


Melt the butter in a frying pan and fry off the pancetta and onions. This should take about 10 minutes. You could of course do this whilst the dough is rising, if you are of a mind to.


Sift the flour into a large bowl (not the oiled one) and stir in the yeast. Make  a well in the centre and pour in three tablespoons with the water (actually, I just added the oil to the water and then poured it in) then add the fine salt and bring the mixture together with a wooden spoon until well combined.


Transfer the mixture to a floured surface and begin to knead the dough. Knead for about 10 minutes and by then you should have a smooth, soft and elastic dough. if the dough is still sticky, then add a little more flour.


Once kneaded, mould the dough into a dome shape, tucking the ends in underneath as much as possible. Place the dough into the oiled bowl and brush the top with oil. Cover with cling film and then leave to rise in a warm place for an hour or so until it doubles in size. Mine took an hour and 15 minutes.


Slide the dough onto the oiled baking tray and work the onion and pancetta mixture into the dough as evenly as you can.
 
Use your fingertips to make indentations into the dough and at the same time flatten and shape the dough into an oval shape which is about 3cm thick.  Leave to rise again for about 40 minutes or so until the dough has doubled in size once more.
 
Preheat the oven to 220c. Gas 7.


Once the dough has risen, make some more indentations into the top and then drizzle the remaining olive oil over it. Sprinkle with the sea salt.
 
Bake in the middle of the oven for about 20 minutes until golden all over. (A confession - I did this, and the top was golden and evidently cooked, but the bottom was a bit soggy. I flipped the focaccia over and put it back into the oven for about five minutes and everything was just fine. You are obviously a better baker than me and you won't need to do this...)


Serve warm. We, being an unsophisticated lot, had this with lasagne and we dunked it into the tomatoey, meaty, cheesy mixture. With what was left over the next day, we spread cheese on it, dunked it in minestrone soup - and it was all good.


Sunday, 14 October 2012

Soup Bread. What a brilliant idea! Zopako, or Basque Soup Bread


Soup deserves such treatment as having its own bread. No more rooting around for the crust at the end of a Warburtons loaf for the act of dunking. This bread is where it is at. Minimal crumb, 'hard; in a nice way - not stale - let's say 'robust', with a grainy, satisfying taste which compliments savoury food (can't see me slathering jam on it to be honest) and is very filling. One slice of this with some soup and you will know you have eaten, and for someone like me who has the ability to eat far too much bread, this is not a bad thing.
 
Putting in 'Spanish' and bread' into Google gave me this recipe. I was looking for something that would go along with the tumbet (in a blog post coming your way soon) and merguez sausages I was thinking of putting together for dinner. I knew that the tumbet would yield tomatoey richness and oil flavoured with aubergine and peppers, and I thought that some bread to go with it would be nice for dunking, and Lola and Finn like it when I make bread, so, kind of a no brainer really.
 
Because I have a history of not always reading the recipe before I start can I point out that this bread takes 12 HOURS TO RISE which I learnt about once I had made the dough up and put it in the front room for its first proving. I was annoyed with myself and then set out to make a spelt loaf which I would use instead, but I noticed after leaving the dough for about 6 hours it had doubled in size, so I figured I would press ahead and prepare it for baking. I don't know if I did the right thing here or not, not being an expert but what came out of the oven and was subsequently eaten was really lovely.
 
A couple of things to mention. Anything that has Dan Lepard's name on it is worth baking and the recipe says about putting nonstick paper on the baking tray that you are going to bake your loaf on. I used greaseproof, thinking it would be nonstick and found that the paper actually stuck to the loaf in places and was difficult to get off. I wonder whether it would really harm the loaf if you lightly oiled a baking tray instead of lining it with paper? Or make sure the paper you are using is truly 'nonstick'? I don't know. But worth mentioning.
 
 
Zopako, or Basque Soup Bread, adapted from Dan Lepard's Article on the Guardian website
 
 
Makes 1 large oval loaf
 
Ingredients:
 
350ml water, somewhere between tepid and cold
¼ tsp fast-action yeast
525g 00 flour, plus extra for shaping (I used strong white flour)50g spelt, wholemeal or more 00 flour (I used wholemeal) 2 tsp fine salt
 
Method:


Pour the water into a large bowl, stir in the yeast, then add the flours and salt. Mix to a firm dough, then lightly knead for 10 seconds, until evenly mixed.


 Return to the bowl, cover with clingfilm to keep in the moisture and leave at room temperature for 12 hours (overnight is probably easiest, assuming you have time to bake the next morning), by which time it should have doubled in volume; if not, leave until it does. (Mine, in a warm room, did it in 8 hours)
 
Not very tapered, but you get the idea
 
Shape the dough into a stick about 30cm long with tapered ends, lay diagonally on a tray lined with nonstick paper, and cover.


After about 30 minutes, uncover the dough, dust liberally with flour, then press a rolling pin firmly down the centre, so that you almost split the loaf in two, leaving it joined only by a membrane of dough right down the middle.
 
Leave to rise again for 30 minutes, then bake at 240C (220C fan-assisted)/465F/gas mark 9 for about 20 minutes, along with a small tray of boiling water on the lowest shelf to make the oven slightly steamy.


Reduce the heat to 200C (180C fan-assisted)/390F/gas mark 6 and bake for 15-25 minutes more, until crisp and the colour you like.


LinkWithin

Related Posts Plugin for WordPress, Blogger...