Lola and Finn's Mum

Lola and Finn's Mum
Showing posts with label yeast. Show all posts

Monday, 4 April 2016

I should coco! - Coconut and Lemon Curd Madeleines

I’ll be honest, I’ve been slapping coconut oil on my face for as long as I can remember, and it is indeed as good a moisturiser and restorative as my previous moisturiser, if not better, which, when I discovered this, was brilliant and disappointing rolled into one. It's brilliant when I think on one hand of the money I now save by buying coconut oil and putting that on my dressing table instead of the (expensive) moisturiser that I had been sucked into buying by promises of eternal youth. My savings now go towards my not insubstantial collection of Kurt Geiger shoes, which is very pleasing, but the cloud that goes with this particular silver lining is my thinking of the copious amounts of money I had spent in the years gone by on 'posh' moisturiser which in turn led me to lament the ‘Kurt Geigers’ that could have been mine if I had been a bit more savvy. Life can be cruel.


But my recent discovery of cooking with coconut oil has been a revelation. A bit of reading around led me to discover that coconut oil had been the ‘go to’ oil for cooking and baking, before we discovered the horrors of hydrogenated, manufactured fats and indeed like many other naturally derived oils, coconut oil had long been a beauty/health staple too by those in the know. Win. Win. So, for no real logical explanation, I decided to celebrate my much improved knowledge by making madeleines.
Regular readers to this blog will know that I am a Francophile, pure and simple. That being the case, it is surprising that my madeleine pan, bought at Super U in a pretty Dordogne town one balmy summer when I was young, beautiful and carefree, before such pans were ever readily available here, has had about three airings in all the time I have owned it. Despite my lack of effort, madeleines are a cinch to make, as long as you are vigilant because like most ‘biscuity’ types, blink and they are burned.

Newly inspired, I decided to make coconut and lemon curd madeleines, which are loosely based on the idea of placing a dollop of something in the middle of the raw madeleine mix. I’d seen it done with Nutella, but with my coconut vibe, I thought that the sharp lemon tang would be a great foil to the mellow, nutty coconut. So, I set off to work, replacing the requisite amount of butter for VitaCoco coconut oil and adding about 50g of desiccated coconut, a pinch of salt and a teaspoon orange flower water (I was thinking citrus…) to a well-established madeleine recipe that I had cut out of a French cookery magazine in the dim and distant past. The result was, even though I say so myself, pretty damn good. It was a good thing that madeleines don’t really keep very well and need to be eaten within a few hours of baking. Marcel Proust used to dip his stale madeleines in his tea; Lola, Finn and Phill snaffled these before I had managed to put the kettle on. There can be no better recommendation in my mind.
And if you don’t like lemon curd, what about lime curd for a totally tropical vibe? Or a dollop of raspberry jam? Now, Coconut and raspberry: Let me just think about that for a moment. Or you could visit www.swearbyit.com for some more great recipes!
This recipe is an entry into the #swearbyit challenge with Vita Coco. Find more great coconut oil recipes and tips on using coconut oil at www.swearbyit.com

Coconut and Lemon Curd Madeleines
Makes approximately 18
Ingredients:
3 large eggs
130g caster sugar
1 tbsp honey
1tsp orange flower water (optional)
100g Vita Coco Coconut Oil, softened,( but cooled if you have melted it) plus a little more for greasing the tin.
50g desiccated coconut
150g plain flour
6g (a generous teaspoon) of dried yeast
A pinch of salt
About a quarter  to half of a jar of good quality lemon curd

Method:
Preheat the oven to 200c

Place the eggs and the sugar in a mixing bowl and beat until light and airy.
Add the honey and the orange flower water if using and mix well.

Add the coconut oil. If it is quite solid, mix it vigorously into the egg mixture until it disperses evenly.

Add the flour, the coconut, a pinch of salt and the yeast and mix until combined. Don’t overbeat. Personally I taste the mixture at this stage to see if I can discern the flavours, in this case, coconut. If it tastes a bit bland, add a little more salt, but be careful.
Grease the madeleine pan very well with the coconut oil. This is imperative as you want your madeleines to come out easily.

Place a heaped teaspoon of the mixture into each madeleine mould. Tap the pan down on the working top to encourage the mixture to settle into the mould.

Place a scant teaspoon of lemon curd onto the madeleine mixture.

Top the lemon curd with another generous teaspoon of the madeleine mixture. You may have to use the spoon to disperse the mixture evenly and it may all become a bit messy, but it will be okay.
Give the madeleines a final tap in the pan and then place them in the middle of the preheated oven. They might spread frighteningly and will look pretty awful initially but all will be fine. They should take about 8 – 10 minutes to bake and they should be a light golden brown with perhaps slightly browner ‘shell’ edges. Remove from the oven and when you can do so. If you have greased the pan well, the madeleines should come away from the moulds easily.

Trim the madeleines to their characteristic shell shape. It is likely that some of the mixture will have spread from the mould and therefore some trimming will be needed to neaten the madeleines up. I just think of all those sweet crispy bits and it pleases me enormously.
Eat warm, or whilst they are not quite cold. They will begin to become a little less light once they have been cold for a while, in which case, do what Proust did: make a pot of tea.

Friday, 21 June 2013

Cake, Italian stylee, and it's not Panettone! Buccellato, or Raisin and Aniseed Cake


I really need to up the cake quota on this blog! I quick glance through will reveal plenty of one pot wonders but not enough cake, and life needs cake, so in the spirit of evening things up a little and also because I am practising escapism through cooking Mediterranean stylee, here is a moist, delicious and versatile cake by the name of 'Buccatello', or raisin and aniseed cake if you happen to be just pretending to be Italian.
 
This cake is a celebratory cake (it says in 'Lazy Days and Beach Blankets', from where this recipe is from) and that kind of justifies the addition of a bit of booze to this cake. It's also a yeasted cake so once it is a little past its best you can bung it in the toaster and spread a bit of jam on it. What's not to like?
 
My addition to this was a late one. When it came out of the mould I thought that this cake did not look celebratory enough, so I mixed up a bit of icing sugar and lemon juice and drizzled some icing over the top. I think this would also look so pretty and celebratory with some summer fruit piled into the middle of the cake.
 
Raisin and Aniseed Cake, or 'Buccatello', adapted from  'Lazy Days and Beach Blankets', by Various.
 
Ingredients:
 
Sachet of dried yeast (or 20g fresh yeast)
150ml milk, warmed
400g plain white flour
115g caster sugar
2 eggs beaten, plus an extra egg white to glaze
50ml Marsala or Vin Santo
50g unsalted butter, melted
finely grated zest of 1 unwaxed lemon
1 teaspoon of aniseed
50g raisins
sea salt
 
For the glaze.
 
Three tablespoons of icing sugar.
The juice of half a lemon (use the lemon you zested for the cake)
 
Method:


Mix the yeast with the warm milk until dissolved then allow to stand.


Sift the flour into a bowl and mix with the sugar and a pinch of salt.


Make a well in the centre and add the yeast mixture, eggs, Marsala, melted butter, lemon zest and aniseed.
 
Mix until the dough comes together (I used the dough hook on my mixer but you could use a palette knife). The dough will be soft.
 
Knead until the dough becomes smooth and elastic.
 
Knead in the raisins.
 
 
Roll the dough into a sausage shape and place into a well buttered ring/savarin/kugelhopf mould, pushing the ends together.


Cover with a damp tea towel and and leave to rise in a warm place for about an hour and a half or until the dough doubles in size.
 
Preheat the oven to 180c
 
Bake in a preheated oven for about 45 minutes, or until golden brown.


Leave to cool in the tin and when just warm, turn out and cool.
 
Mix the lemon glaze by combining the icing sugar with the lemon juice. You want a dropping consistency that isn't too runny. You might need to mix together the icing sugar and lemon juice in stages to get the consistency you want.


Using a spoon, drizzle the lemon glaze over the cake.

Friday, 10 May 2013

A random reason to eat your crusts: Coconut Milk Bread


Oh, how have I neglected my little blog of late. April has been almost devoid of food musings due to the double distraction of 'spring cleaning and decluttering' (kinda good) and marking A level coursework (not so good) and whilst I still have an attic full of (Phill's) stuff that needs to be acquainted with the tip, the coursework is done and dusted and I can indulge in something more gratifying and therapeutic.

So, therapeutic. I have already talked about the therapeutic and frankly nurturing qualities of making bread. From the 10 minutes of kneading in which you can take out all your irritations, to the prove, to the knock back, to the smell of baking bread and the tap of a hollow bottom, making and baking bread is good not only for bingo wings but it is good for you. Totally.


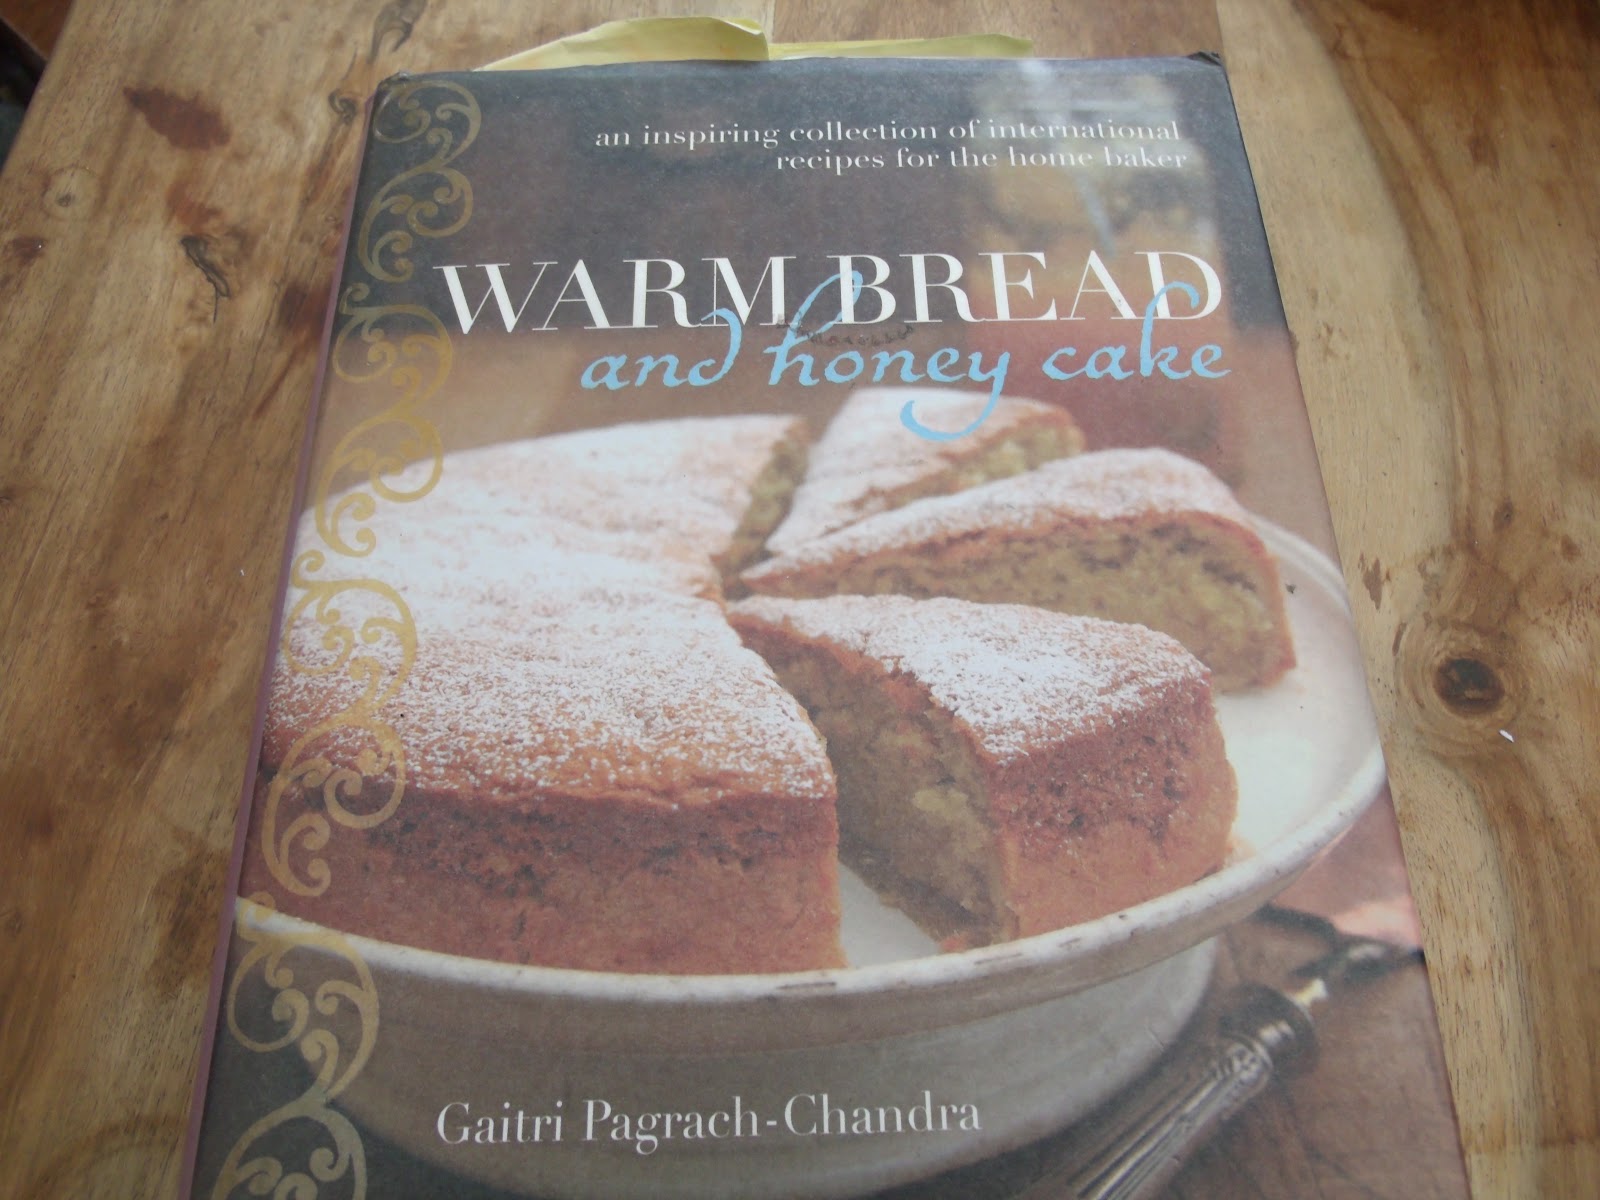
And it was great to bake bread for this month's random recipe challenge hosted by Dom at Belleau Kitchen. The randomness proved a bit difficult as I have two (mostly) bread books and then I have lots of books with the odd loaf knocking around in them, so to save myself from going mad I picked the one I have never cooked anything out of and opened the book:


The book: Warm Bread and Honey Cake by Gaitri Pagrach-Chandra


And here we are: Coconut Milk Bread.

What can I tell you about this loaf. Well, it didn't seem to rise a tremendous amount on the first proving but after being knocked back and put into tins it did seem to get its act together. The bread tastes amazing. There will be some kind of scientific reasoning that means that the ingredients combine to create the best crusts ever, or else I maybe left it in too long, but if you are a crusts girl (or boy) like me, you will not be disappointed. And the texture and taste is 'filling' but with a creamy and slight saltiness that is just so, so good. I took advantage of the cook's perk of slicing a piece whilst still warm and slathering it in some butter. It was at that time I realised that a life without bread would be, frankly, crap.

So, here you go. the recipe.
 
Coconut Milk Bread taken from Warm Bread and Honey Cake by Gaitri Pagrach-Chandra
 
Makes (450g/1lb) two loaves
 
My adaptations in red
 
Ingredients:
 
750g strong white flour
2 1/2 tsp easy blend (active dry) yeast
3 tbsp sugar
1 1/2 tsp salt
100g butter, melted and cooled slightly
350ml lukewarm coconut milk (Note: I added my coconut milk straight from the tin into the melted butter to cool the butter and make the coconut milk lukewarm, if that makes any sense!)
 
Method:


Put all the ingredients into a large bowl and mix to combine the ingredients and then knead weither by hand or with a dough hook in a mixer until the dough becomes smooth and supple.


Bring together into a ball and put in an oiled bowl, cover with cling film and leave to rise until it is doubled in size. (Took about an hour and a half for me)


Knock back the dough and and knead lightly until smooth again. Divide into two portions, roll with your hands into a ball type shape and place into prepared loaf tins, seam side down. Cover both loaves and leave to rise once again until doubled in size.
 
Preheat the oven to 200c/400f
 
Crusts!
 
 
Bake in the oven for about 30 minutes. To test, remove the loaves from the tins, tap on the bottom and top and they should sound hollow. Cool on a wire rack.


Saturday, 5 January 2013

Bread and cheese? Together? Sounds brilliant to me. Panini al Gorgonzola, or Gorgonzola and Walnut Rolls


A little anecdote to set us off. I was thinking about the way that I really now enjoy making bread, now I seem to make stuff that does indeed resemble a loaf rather than a sponge, and it seems a far cry from the conversation that I had about 15 years ago with an English adviser who had come into the school where I was working to 'advise', as in 'state the bleeding obvious and get paid £300 for doing so', and whilst she was telling us things that we already knew, she was also waxing lyrical about the joy of making her own bread and asked me if I made my own. I looked at her with more than a little bewilderment and told her that no, it was easier to buy it from Tesco (other supermarkets are available) and that my time was taken up by ploughing through paperwork with a little bit of marking to justify the fact that I teach for a living. Yes, I started off bolshy and have progressively got worse. She merely smiled. She had time to make her own bread. Or, if she was far too busy, she made time.

And, she was right. Fast forward 15 years and here I am, dabbling in bakery and making the odd loaf here or there. Out of all the recipes I have made, the meals I have produced, the cakes I have frosted, I get no better satisfaction from making bread. It must be the rigorous involvement of kneading, plus the nurturing glances at the dough as it rises and then, to top it all, the smell as it bakes. Glorious.

So, this recipe, like many of the others, is from Gino D'Acampo's 'Italian Home Baking' and it combines two ingredients which were made for each other, Gorgonzola and walnuts. It produces a taste which is all at once nutty with an almost spicy then creamy hit of Gorgonzola. I got Lola and Finn to dip these rolls into tomato soup, once they got a bit past their best, but at their best, with a little prosciutto and a icy cold glass of wine, really, really heavenly.

So, when it comes to making bread, now I make time. It's worth it.

Panini al Gorgonzola, or Gorgonzola and Walnut Rolls, from 'Italian Home Baking' by Gino D'Acampo

Makes 12 rolls

Ingredients:

350g strong white flour, plus extra for dusting
350g wholemeal flour (I used spelt flour)
7g fast action yeast
1 tsp salt
200ml full fat milk, warm
250ml water, warm
180g Gorgonzola cheese, cubed
90g walnuts, roughly chopped
olive oil for brushing

Method:

Brush two baking trays with oil.


Combine the flours, the yeast and the salt together in a large bowl. make a well in the centre.
 
Pour the milk and the water and mix the ingredients together to form a soft dough.

Dump the dough onto a floured surface and knead for about 10 minutes or so.


Work the Gorgonzola and the walnuts into the dough and return the dough to the bowl. Brush the top with some oil and cover with cling film. Allow the dough to rise in a warm place away from draughts for about an hour.


When risen, turn out the dough into a lightly floured surface then divide the dough into 12 equal sized balls. Place on the oiled baking trays, putting space between each roll to allow them to rise once more. Brush with oil and cover with cling film and allow them to rise for a second time. This time, for about 45 minutes.

Whilst the rolls are rising, preheat the oven to 220c, Gas 7.

Remove the cling film and bake in the middle of the oven for 20 minutes until golden brown.


Remove from the trays and leave the rolls to cool slightly on a wire rack.


You can eat these warm. And why wouldn't you? And then you can eat more of them when they have cooled further.

Saturday, 24 November 2012

Flippin' Fabulous Focaccia! - Focaccia Con Pancetta e Cipolle, of Focaccia with Crispy Pancetta and Onions


I am so loving making bread at the moment. I really can't put my finger on why but I out of all the cooking disciplines that might exist, making and baking a loaf of bread gives a real boost to this person's culinary ego and, cliche ridden though it may be, it's hard not to feel some sort of heart warming emotion as you carefully remove your loaf from the oven, all risen and golden and smelling just divine. If you're anything like me you are nicking a bit off the side with a knife before it is even cool enough to eat, but that's bread for you. It's the staff of life and if you are not on one of those carb free diets, (perish the thought!) then bread makes you extraordinarily happy.
 
Regular readers of this blog may know that some of my recent bread making exploits have come from 'Italian Home Baking' by Gino D'Acampo and this is also one of his wonderful recipes. I had intended to just make his Gorgonzola and walnut rolls but a flick over a few pages and this recipe was just 'speaking' to me. What the hell, I'll make both. So I did. I am sure the rolls will make an appearance in a blog near you sometime soon, for they were also gorgeously tasty and sustained me this week by being dunked into soup whilst on my lunch break. But more of them another time.
 
I think this is the best bread I have made in a long time. I think, on occasion, my bread is sometimes a little doughy but I am still very much a novice and I know that there is so much nurturing and cajoling needed to produce a decent loaf. This one though had an amazing texture, heavier than anything you might buy at the supermarket but not oppressively so. I think 'satisfying' is the word I am looking for. The addition of the bacon and the onion was to die for. My mum used to make cheese and onion bread in terracotta pots (no wonder I am deranged) and the way that the sweet sauteed onion almost melts into the bread is seriously divine. Amazingly good. And even when the bread is no longer warm it is a joy to eat. I spread some soft cheese on it and I was happy all over again.
 
Make this bread. It's 'buonissimo!' And Lola and Finn were crazy for it too.
 
Focaccia con Pancetta e Cipolle, or Focaccia with Crispy Pancetta and Onions, from 'Italian Home Baking' by Gino D'Acampo
 
Serves about 10 if you've a crowd coming round.
 
Ingredients:
 
2 tbsp salted butter
250g diced pancetta
1 large onion, finely chopped
7g fast action yeast (one of those sachets, basically)
6 tbsp extra virgin olive oil plus extra for brushing
300ml of warm water
2 tsp fine salt
1 tbsp sea salt
 
Method:
 
Start by brushing a large baking tray and a bowl with oil.


Melt the butter in a frying pan and fry off the pancetta and onions. This should take about 10 minutes. You could of course do this whilst the dough is rising, if you are of a mind to.


Sift the flour into a large bowl (not the oiled one) and stir in the yeast. Make  a well in the centre and pour in three tablespoons with the water (actually, I just added the oil to the water and then poured it in) then add the fine salt and bring the mixture together with a wooden spoon until well combined.


Transfer the mixture to a floured surface and begin to knead the dough. Knead for about 10 minutes and by then you should have a smooth, soft and elastic dough. if the dough is still sticky, then add a little more flour.


Once kneaded, mould the dough into a dome shape, tucking the ends in underneath as much as possible. Place the dough into the oiled bowl and brush the top with oil. Cover with cling film and then leave to rise in a warm place for an hour or so until it doubles in size. Mine took an hour and 15 minutes.


Slide the dough onto the oiled baking tray and work the onion and pancetta mixture into the dough as evenly as you can.
 
Use your fingertips to make indentations into the dough and at the same time flatten and shape the dough into an oval shape which is about 3cm thick.  Leave to rise again for about 40 minutes or so until the dough has doubled in size once more.
 
Preheat the oven to 220c. Gas 7.


Once the dough has risen, make some more indentations into the top and then drizzle the remaining olive oil over it. Sprinkle with the sea salt.
 
Bake in the middle of the oven for about 20 minutes until golden all over. (A confession - I did this, and the top was golden and evidently cooked, but the bottom was a bit soggy. I flipped the focaccia over and put it back into the oven for about five minutes and everything was just fine. You are obviously a better baker than me and you won't need to do this...)


Serve warm. We, being an unsophisticated lot, had this with lasagne and we dunked it into the tomatoey, meaty, cheesy mixture. With what was left over the next day, we spread cheese on it, dunked it in minestrone soup - and it was all good.


LinkWithin

Related Posts Plugin for WordPress, Blogger...