Lola and Finn's Mum

Lola and Finn's Mum

Wednesday 18 December 2013

I really should have thought of this far earlier - Jam Butty Pudding


Given my refreshing sense of laissez-faire when it comes to life (This is my kind way of saying 'can't be arsed') I seem to have three half used jars of jam randomly arranged on my worktop and half a loaf of stale bread, because I didn't wrap it up properly, and I could have made toast and jam, but this is so predictable. Instead I decided to make it far more unhealthy by encasing the aforementioned bread and jam in a creamy vanilla custard, therefore creating, if you will, jam butty pudding.  If you are not from these parts,'butty' means 'sandwich' and 'pudding' means 'something glorious' ... probably.
 
I could have taken the crusts off I suppose, but personally I kinda like the way they crisp up and create that wonderful textural contrast between crunch and softness. And you could use any old jam you like. This just happened to be strawberry but, you know, I could be persuaded to use any jam. I think I would like to use the quince jelly I have, which means I'll have to buy even more of it when I next go to France. Shame.
 
I made this so it would be a set custard, so I was working on 100ml of liquid to one egg and I did this because I wanted to pour a little cream over when I served this. I was thinking crunchy, soft, warm then cold. If you wanted to, you could increase the liquid to egg ratio for a more liquid custard. I only added about 30g of sugar because I wanted the jam to be the sweetness, but that is all about personal taste. You could also cook this, bain marie style but I'll be honest, due to my liking of laissez faire, I just bunged it in the oven with some foil on top for about 30 - 40 minutes or so, then checked if the custard was starting to solidify, which it was. Then I removed the foil and let the top brown for about 15 minutes or so.
 
By the way, if by some peculiar notion you happen to have leftovers, this is really quite nice the next day. Let's just say that I have eaten breakfasts that are far, far worse...
 
Jam Butty Pudding
 
Ingredients:
 
Six to eight slices of stale, white bread
Half a jar of jam (I used strawberry)
150ml double cream
150ml milk
3 eggs
a vanilla pod (you could use extract)
30g sugar (or to taste)
 
Method:
 
Preheat the oven to 180c


Make jam sandwiches (take the crusts off if you want)


Cut the sandwiches into triangles that will fit snuggly into an ovenproof dish. Arrange them so that they sit in the dish reasonably tightly.


Meanwhile to make the custard, mix the liquids, the eggs and the sugar together. Slit the vanilla pod and scrape the seeds into the mixture. Then put the vanilla pod in. (or just use a tsp of extract).


Pour some of the custard mixture over the sandwiches and allow the bread to absorb it. Then pour the rest of the custard over.
 
Place the dish on a tray and cover with dish with foil. Place in the oven for about 30 - 40 minutes. Check the pudding round about 30 minutes to see if the custard is beginning to set. Take the foil off for the last 20 minutes or so to brown the top, but keep an eye on it as it could burn quickly.
 
Once you're happy with the colour, take the dish out of the oven. The pudding should appear quite puffed but will sink once it comes out of the oven.


Serve warm, with a splosh (or more) of cream.


Saturday 7 December 2013

Feelin' Festive: Cupcakes that look like Christmas trees, if you really, really squint...


Blogging. I used to do it so often once upon a time, but now, well, I think it is going to be a 'high days and holidays' type activity, and talking of holidays, Finn's class were in charge of the cake stall for the Christmas fair, and because the Christmas holidays can't come soon, I thought I would get into the mood for it all with some festive baking.
 
I realised that I hadn't made anything from the amazing Rachel Allen just yet (and this blog is already two and a half years old...) so as a fan of her gorgeous cakes I thought I would use her recipe for chocolate cupcakes and then adorn them with a green swirl and a few strategically placed dragees to make them look vaguely Christmas tree like, if you really, really squint...
 
I decided to finish them off with some sugarpaste stars, which I ambitiously decided to cut out by hand before remembering that my mum had given me my shapes that I used to use to cut out playdoh when I was a kid. In there, I found a cute little star cutter. Problem solved.
 
A few musings about frosting. I don't really follow a recipe to be honest. I mix unsalted butter, some vanilla extract, icing sugar and a bit of milk to slacken it off if need's be, but I have given some approximate weights in the recipe below.
 
Chocolate cupcakes with vanilla frosting from 'Cake Diaries' by Rachel Allen
 
Makes 12 cupcakes
 
Ingredients:
 
100 g (31⁄2 oz) butter, softened
150 g (5oz) caster sugar
2 eggs
125 ml (41⁄2 fl oz) milk
175 g (6oz) plain flour
25 g (1oz) cocoa powder
2 tsp baking powder
pinch of salt
 
For the frosting:
 
200g butter, at room temperature
500g icing sugar (to be added gradually and to taste)
1 tsp vanilla extract
1 - 2 tbsp. milk
holly green food colouring
a little sugarpaste
silver balls
edible glitter
 
 
Method:
 
 
Preheat the oven to 180°C (350°F/Gas 4), and line the muffin tray with the paper cases.


Cream the butter until soft in a large bowl or in an electric food mixer. Add the sugar and beat until the mixture is light and fluffy.


Whisk the eggs together in a small bowl for a few seconds or just until mixed, then gradually add them to the butter mixture, beating all the time.
 
 
Pour in the milk and beat until mixed. Sift in the flour, cocoa powder, baking powder and salt and mix gently to combine.
 
 
Divide the mixture between the muffin cases, filling each case two thirds full. Bake for 20–25 minutes or until well risen and lightly springy to the touch.
 
Allow to cool for 5 minutes, then remove from the tray and place on a wire rack to finish cooling down.
 
Meanwhile, make the frosting. beat the butter in a mixer until it is very soft. Slowly add the icing sugar a bit at a time with a few drops of vanilla extract until you are happy with the sweetness and the consistency. You could add a little milk to slacken the mixture off or to reduce the sweetness a tiny bit.
 
You will need to beat the mixture for a while so that the icing sugar dissolves and the icing is smooth and becoming fluffy but spreadable (or pipeable... possibly a new word there...)


To decorate the cakes use a large star nozzle on a piping bag, and pipe a swirl on top of each cake. Then place some dragees and sprinkle some edible glitter on top of the swirls. In a final flourish, cut out stars out of sugarpaste and place them on top.


Friday 15 November 2013

Que bananes trop mûres ont été faites pour ! Gâteau de Banoffee .

 
Avec un peu d'aide d'un dictionnaire, puis Google Translate quand j'étais vraiment désespéré!

C'est presque la peine de laisser vos bananes vont noir , juste pour faire ce gâteau . Personnellement , les bananes doivent être parfaitement jaune si je vais les manger. S'il y a des taches noires sur eux alors qu'ils sont trop mûr et sucré à manger . Heureusement, bananes mûres font de grands gâteaux et c'est une belle recette qui fait un gâteau qui reste humide pendant plusieurs jours si vous le gardez correctement .

J'ai hâte de blogging pour 'European Day for Multilingual Blogging' et essayer mon français pour un but réel . Depuis que j'ai étudié le français ( et en allemand) il y a de nombreuses années , les temps d'utiliser mon français ont été rarement et c'est seulement depuis que j'ai commencé à visiter régulièrement en France encore une fois que j'ai réalisé à quel point je l'aime vraiment la France. Est d'écrire en français une fois de plus un plaisir, même si je ne reçois quelques-uns des mots mal ! C'est bizarre, mais depuis longtemps je préfère la langue allemande (et je suis de mieux en mieux ) , mais maintenant , je préfère le français.

Quoi qu'il en soit , d'un intérêt à un autre . Il n'y a pas assez de gâteaux sur ce blog voici donc un autre. C'est à partir de 'The Birthday Cake Book' par Fiona Cairns et est une éponge banane garni de délicieux glaçage au caramel. J'ai essayé de décorer le dessus avec les tranches de bananes séchées , mais je ne pouvais pas trouver, donc j'ai choisi quelques caramels tendres pour décorer . Non recommandé si vous avez des plombages en vrac.Quoi qu'il en soit , voici la recette et si vous voulez la version anglaise de cette , cliquez ici.

Gateau de Banoffee adapté de 'The Birthday Cake Book ' par Fiona Cairns
 
 
Ingrédients

120g de beurre non salé , ramolli , et plus encore pour les boîtes .
250g de farine à gâteaux
1 cuillère à café de levure chimique
Pincée de sel
¼ cuillère à café de noix de muscade râpée
1 cuillère à café de cannelle moulue
160g brun (light muscovado ) de sucre
3 extrêmement mûrs, grosses bananes
2 oeufs, légèrement battus
1 cuillère à café d'extrait de vanille
2 cuillères à soupe de lait entire

Pour la crème au beurre de caramel : (Note: j'ai réduit de moitié les quantités à produire suffisamment pour prendre en sandwich au beurre puis haut du gâteau) .

240g de beurre non salé , ramolli
60g brun (light muscovado ) de sucre
2 cuillères à soupe de sirop d'or
1 cuillère à soupe de crème entiere
1 cuillère à café d'extrait de vanille
200g de sucre glace , tamisé
Chips de banane , ou des bonbons au caramel pour la décoration.


Méthode:

Préchauffer le four à 180C/350F .


Beurre de deux moules à gâteau rond de 20 cm . Assurez-vous qu'ils sont des boîtes avec des côtés profonds ( 3 ou 4cm, peut-être) .
Si nécessaire, créer un collier d'une double épaisseur de papier sulfurisé pour arriver au-dessus des côtés.


Tamiser ensemble la farine, le sel , la poudre à pâte , la cannelle et la muscade.


Battre en crème le beurre et le sucre dans un mélangeur jusqu'à ce que doux et moelleux .
Pendant ce temps, écraser les bananes avec une fourchette.


Ajouter les oeufs , la vanille et le lait au mélange de beurre avec une cuillère de farine pour éviter que le mélange du fractionnement .


Plier dans le mélange la farine restante , puis les bananes , puis verser la pâte dans les moules .

Cuire au four environ 40 minutes ou jusqu'à ce qu'un cure placé dans le milieu du gâteau sort propre.
.


Retirer le gâteau du four et passer un couteau autour des côtés .
Prenez les gâteaux sur les boîtes et laisser refroidir .


Pour faire la crème au beurre , faire fondre 80g de beurre , la cassonade et le sirop sur feu doux jusqu'à ce qu'il soit d'une couleur caramel foncé. Prendre le mélange du feu et ajouter la crème et l'extrait de vanille . Gardez en remuant le mélange . Laisser refroidir .


Dans un mélangeur , battre le beurre restant jusqu'à ce que doux et moelleux puis ajouter le sucre glace et battez le mélange pendant au moins cinq minutes, ou jusqu'à consistance légère et crémeuse .


Ajouter le mélange de caramel refroidi et battre en bien .


Utilisez la crème au beurre pour prendre en sandwich les gâteaux ensemble.
Puis couronner le gâteau généreusement avec le beurre restant .

Décorer avec des chips de banane , ou avec des caramels .

What overripe bananas were made for! Banoffee Cake

 
It is almost worth letting your bananas go black, just to make this cake. Personally, bananas have to be perfectly yellow if I am going to eat them. If there are black spots on them then they are too ripe and sweet to eat. Luckily, ripe bananas make great cakes and this is a lovely recipe which makes a cake that stays moist for several days if you keep it properly.
I have been looking forward to blogging for the European Day for Multilingual Blogging and trying out my French for a real purpose. There is a French version of this blog post here if you are interested. Since I studied French (and German) many years ago, the times to use my French have been seldom and it is only since I have started visiting France regularly again that I have realised just how much I really love France. To write in French once again is a pleasure, even if I do get some of the words wrong! It is odd, but for a long time I preferred the German language (and I was better at it), but now, I prefer French.
Anyway, from one interest to another. There are not enough cakes on this blog so here is another one. It is from ‘The Birthday Cake Book’ by Fiona Cairns and is a banana sponge topped with delicious toffee frosting. I tried to decorate the top with dried banana slices but I couldn’t find any, so I picked out some chewy toffees to decorate. Not recommended if you have loose fillings.
Banoffee Cake adapted from ‘The Birthday Cake Book’ by Fiona Cairns
 Ingredients:
120g unsalted butter, softened, plus more for the tins.
250g self raising flour
1 teaspoon baking powder
Pinch of salt
¼ teaspoon grated nutmeg
1 teaspoon ground cinnamon
160g brown (light muscovado) sugar
3 extremely ripe, large bananas
2 eggs, lightly beaten
1 teaspoon vanilla extract
2 tablespoons whole milk
For the toffee buttercream: (Note: I halved the quantities to produce enough buttercream to sandwich then top the cake).
240g unsalted butter, softened
60g brown (light muscovado) sugar
2 tablespoons golden syrup
1 tablespoon double cream
1 teaspoon vanilla extract
200g icing sugar, sifted
Banana chips, or toffee sweets for decoration.
Method:
Preheat the oven to 180c/350F.
 
Butter two 20cm round cake tins. Ensure they are tins with deep sides, (3 or 4cm, maybe). If necessary, create a collar of a double thickness of baking parchment to come up above the sides.
 

Sift together the flour, salt, baking powder, cinnamon, and nutmeg.
 

Cream together the butter and the sugar in a mixer until soft and fluffy. Meanwhile, mash the bananas with a fork.
 
 
Add the eggs, vanilla and milk to the butter mixture with a spoonful of flour to prevent the mixture from splitting.
 

Fold in the remaining the flour mixture, then the bananas, and then pour the batter into the tins.
Bake for about 40 minutes or until a skewer placed into the middle of the cake emerges clean. .


Remove the cake from the oven and run a knife around the sides. Take the cakes out of the tins and allow to cool.


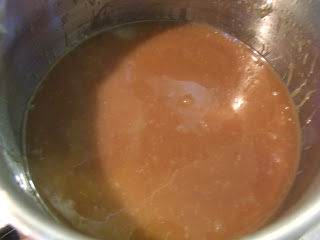
To make the buttercream, melt 80g of the butter, the brown sugar and the syrup over a low heat until it is a deep caramel colour. Take the mixture off the heat and add the cream and the vanilla extract. Keep stirring the mixture. Allow to cool.
 

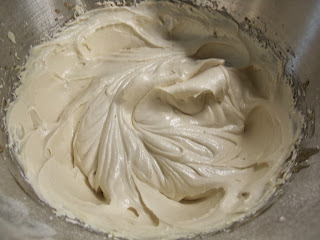
In a mixer, beat the remaining butter until soft then and fluffy add the icing sugar and beat the mixture for at least five minutes, or until light and creamy.


Add the cooled toffee mixture and beat in well.
 
Use the buttercream to sandwich the cakes together. Then top the cake generously with the remaining buttercream.
Decorate with banana chips, or with toffees.

Sunday 3 November 2013

Just like Mama (Romano) used to make - Mama Romano's Baked Lemon Chicken


Sometimes it all comes together doesn't it? There I was, flicking through a cookbook in an idle moment (literally, so it feels) and there was a recipe that had been earmarked with a post it note in the dim and distant but the book had been shut and put back on the shelf, which kind of indicates one of two things - I have a short memory or else I have too many cookbooks. Actually, it probably indicates both things, seeing as it is me that is the subject of this particular character analysis. Anyway, in a 'What to cook that isn't faffy and uses up some of my freezer booty of reduced price meat' moment, I rediscovered 'Mama Romano's Baked Lemon Chicken' and space was duly made in the freezer and I breezed around the kitchen looking serene as a wonderful alchemy of chicken, thyme, lemon and garlic took place in my oven.
 
So, this recipe made me mull over several subjects whilst I was slicing onions and squeezing lemons. Firstly, mamas in general. There is something which pleases me about a dish which has some sort of hereditary provenance in that it was something that mama used to make. I have my own memories of what my mum cooked when I was at home, and indeed my mum's mum who loved a kitchen faff more than me I think. There is something vaguely egotistical about me which hopes that sometime in the future my own children will have a memory of something I used to cook that lives on in their memory from when they were children. Although come to think if it, egotistical is probably the wrong word. It is not ego to want to look after your children and cooking them something is part of the love that I try to give every single day (though if they read this at the moment they would think the 'love' was something that was a bit lacking, seeing as I seem to spend an inordinate amount of time peering at an unrealistic set of numbers on a laptop, or else marking the night away, making the occasional grunt when Phill offers me a brew, but kids it is still there, the love...)

Anyway, maybe Mama Blundell (if I ever get around to marrying the father of my children) will provide a special meal in years to come for Lola and Finn to wax lyrical about, though knowing Finn for instance it will be most likely celebrating the event of opening a bag of chicken nuggets, which is all he seems to want to eat anytime. Period. Until then, some other 'mama' will have to do...
 
This recipe is adapted from the Union Square Café cookbook by Danny Meyer and Michael Romano. As well as mulling over mamas I also remembered my wish to get around New York and eat my way around the place. Best lose half my body weight first. My curiosity for this book was piqued by my liking for all things Barefoot Contessa. It was her mentions of this restaurant that made me treat myself to this particular cookbook.
 
Here is the recipe:
 
Mama Romano's Baked Lemon Chicken. adapted from The Union Square Cookbook by Danny Meyer and Michael Romano.
 
Serves Lola, Finn, Mum and Dad and one other
 
Note: American recipe and therefore uses cups. I have put my notes in red
 
Ingredients:
 
3 1/2 pounds chicken breasts and thighs, skinned (I used thighs and kept the skin on)                  
1/4 teaspoon salt
Freshly ground black pepper
1/3 cup flour for dredging
2 tablespoons olive oil
3 cups thinly sliced onions
1 1/2 tablespoons thinly sliced garlic (I chopped mine really fine) 
8 sprigs fresh thyme (I used a heaped teaspoon of dried thyme) 
1 1/2 cups chicken stock
                2 lemons                   
 
Method:
 
Preheat the oven to 400 degrees.


Cut the chicken breasts in half, and season all chicken pieces with salt and pepper. Dredge in the flour.


Heat 1 tablespoon of olive oil in large ovenproof skillet or Dutch oven over medium heat. Saute the chicken pieces until golden brown. Transfer to a plate, and reserve.


Discard the fat from the skillet, and add the remaining olive oil. Add the onions and garlic, and cook over low heat for 15 minutes, stirring occasionally, until the onions are very soft and lightly browned. Remove from heat.
 
Spread the thyme over the onions and garlic. Arrange the browned chicken pieces side by side over the onions in the skillet. Add the chicken stock.


Cut one lemon into thin slices, remove the seeds, and place one slice atop each piece of chicken. Cut other lemon in half and squeeze through a strainer over the chicken. Return the skillet to the heat, and bring the stock to a simmer. Cover the pot, and bake in the oven for 5 to 15 minutes, basting the chicken with the cooking liquid.


I served this with some new potatoes and vegetables.

LinkWithin

Related Posts Plugin for WordPress, Blogger...